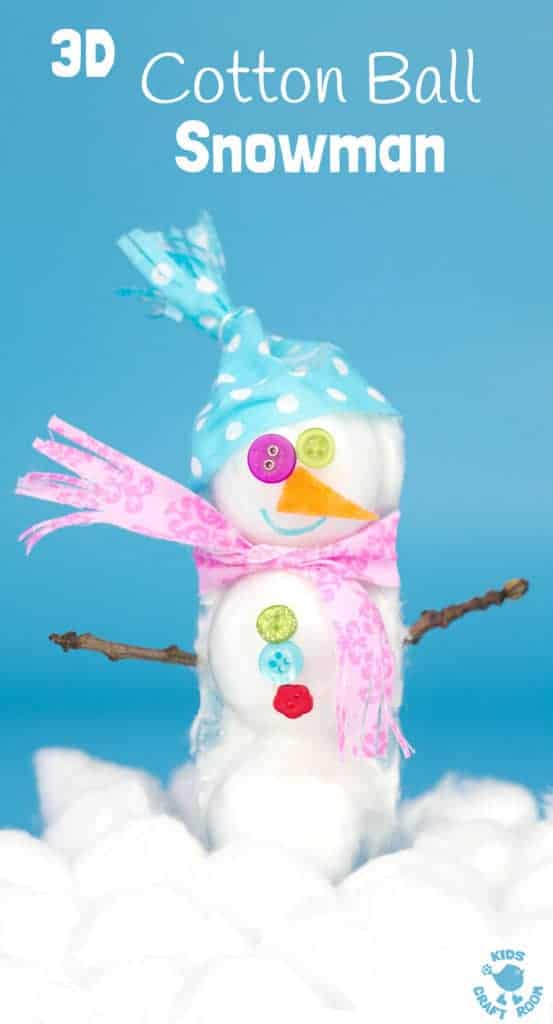
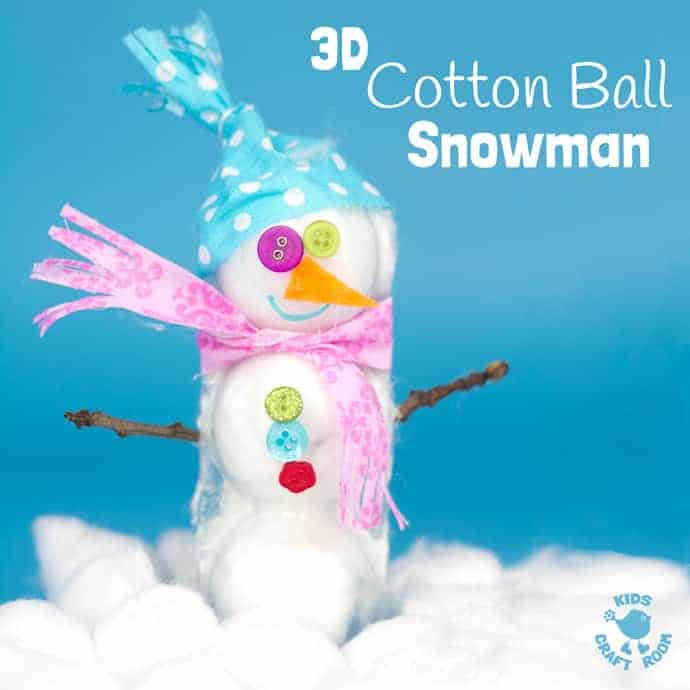
Here’s a cotton ball snowman craft with a difference because this one is completely 3D! Kids can make cute snowmen that actually stand up! This is such a fun Winter craft for the kids.
You can use your 3D Cotton Ball Snowman to decorate the classroom for Winter or add it to a small world snow scene for Winter themed imaginative play or even hang it on the Christmas tree!
However you choose to use them these cute standing snowmen with natural stick arms and gorgeous button eyes are sure to delight.
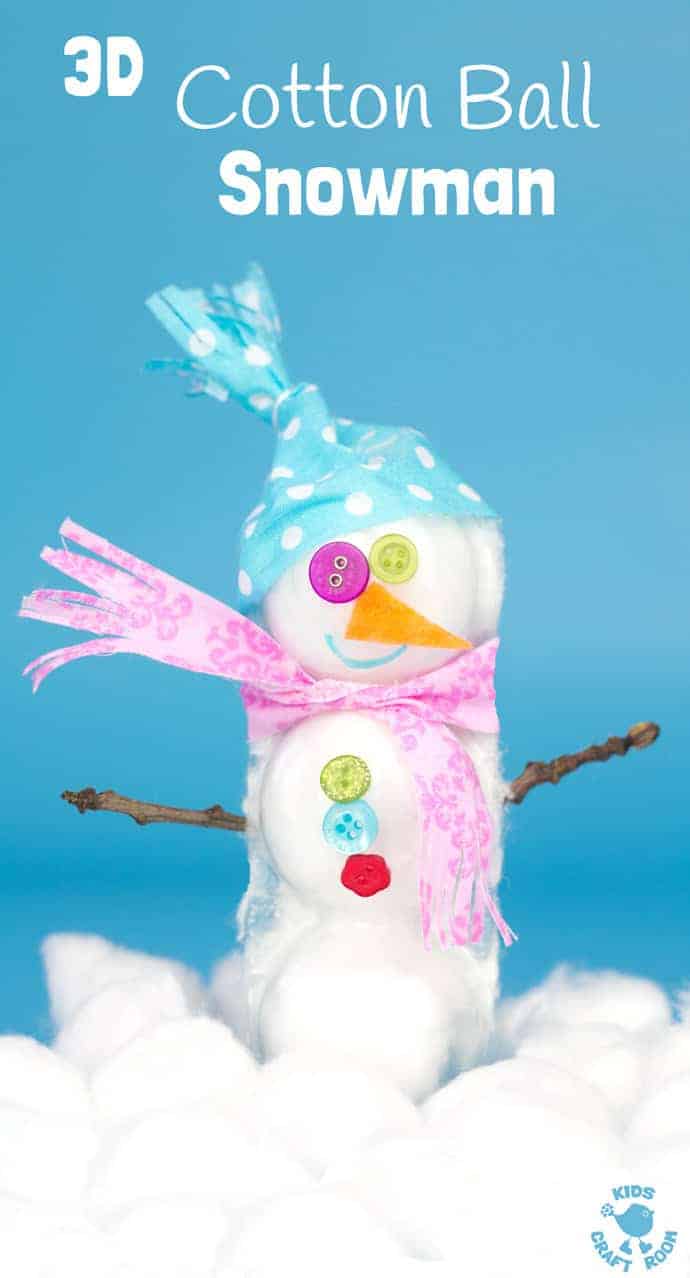
I love simple Winter crafts and this 3D cotton ball snowman craft is super easy to make. It cleverly uses some recycled materials and cotton wool to give a solid three sectioned snowman that stands up! Won’t the kids just love him!
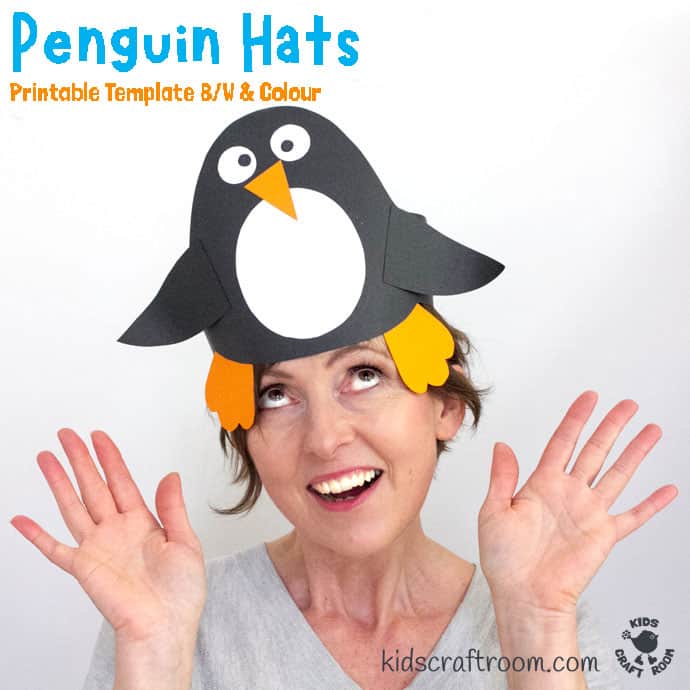
Before you get busy with our 3D snowman tutorial below, why not pin or bookmark some of our other favourite Winter crafts to come back to later too? We’ve got so many fun ideas for you to enjoy with your children all Winter long. Why not decorate the house or classroom with Sparkly Icicles or Snowman Luminaries? Or how about some Small World Penguin play or diving into some Sensory Snow Gel?


Itching to get started with your 3D snowmen? Let’s do it!
3D Cotton Ball Snowman Craft
Supplies To Make 3D Snowmen
- Cotton Balls
- UHU Glue
- Craft Buttons
- Colourful Fabric Scraps
- Sticks
- Sectioned Meatball Packing Tray
How To Make 3D Cotton Ball Snowmen

My local supermarket sells fresh meatballs in amazing sectioned plastic trays that are just perfect for making 3D snowmen. (If you aren’t lucky enough to be able to find these scroll down to the bottom of the post for a simple alternative.)
Start by cutting your tray into two lengths of three. Be careful of sharp edges on the plastic.

To make your snowman white and solid, fill one plastic 3 sectioned length with two cotton wool balls in each part. We teased ours open a smidge to make them more fluffy.

Choose some small sticks from outside and pop them into the middle of the central section to make adorable snowman stick arms.

Apply some glue all around the outside of your second empty plastic tray. I chose UHU glue for this because it’s easy to apply accurately and dries quickly with no danger of sticking fingers together.

Put the second plastic tray onto the first and you have a fabulous 3D snowman shape ready for decorating.
How To Decorate A 3D Snowman
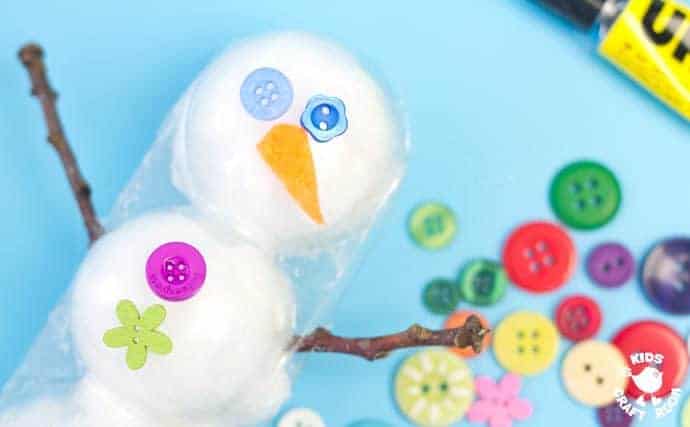
You can use any odds and ends you like to glue on features to your cotton ball snowman craft. We chose some small colourful craft buttons for his eyes and clothes and made the snowman’s carrot nose from a piece of orange felt.
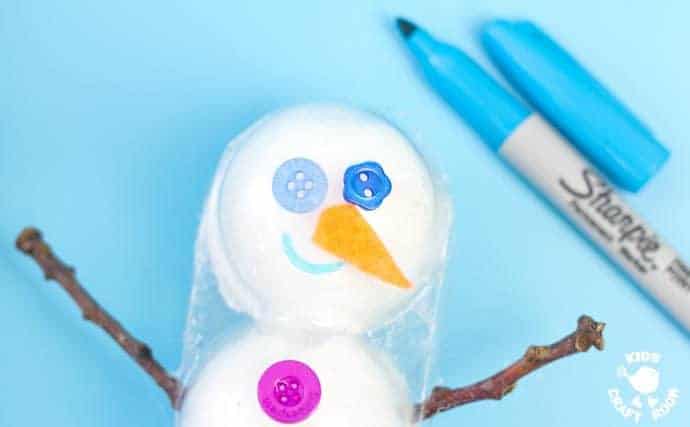
We gave the snowman a cheeky smile with a Sharpie pen.
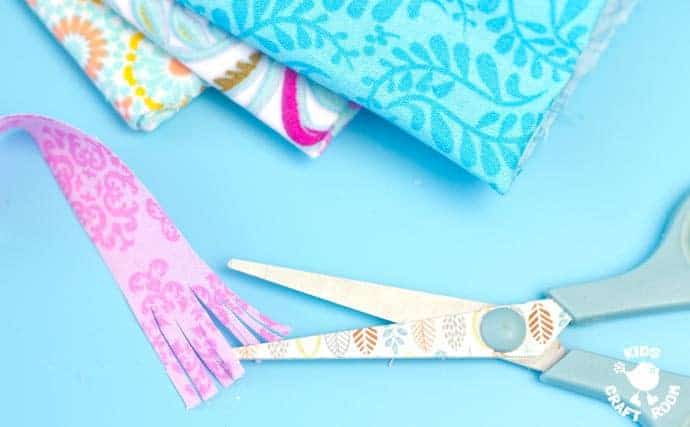
To make our snowman’s scarf we cut a narrow length of bright fabric and snipped the ends to make tassels. I always have a selection of fabric bundles for the kids to use in their art and craft sessions. You can pick them up cheaply and they give us a great range of colours and patterns.

To make the snowman’s hat we cut a wider fabric strip, rolled it up and tied it two thirds up. Then we snipped into the end to make a kind of pom pom hat.
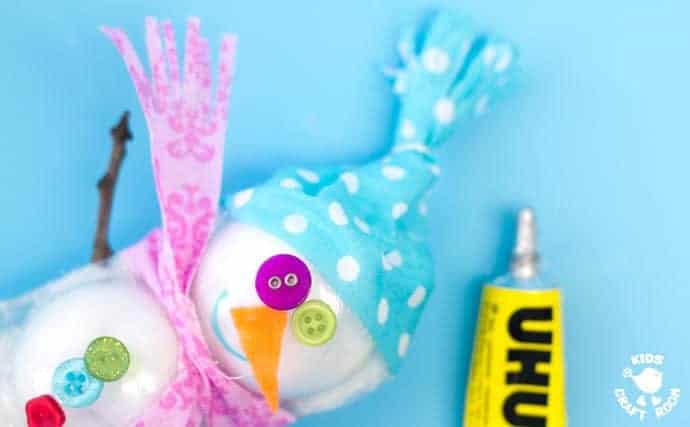
We finished our 3D cotton ball snowman craft by tying on the scarf and gluing on the hat. What total Winter cuteness don’t you think?

I think this cotton ball snowman craft is adorably cute! To make our snowman stand up we trimmed the bottom of the plastic to make it flat. If you’re struggling with this you could always attach it to a bit of plasticine or glue a tiny ball of cotton wool onto the bottom to balance it out.
Don’t worry if you want to make a 3D cotton ball snowman but don’t have a plastic meatball tray in your recycling. Check out our alternative below.
How to make a 3D snowman if you can’t find sectioned meatball trays in your supermarket:
A simple alternative is to use a jumbo craft stick as a snowman spine, so to speak and stick your cotton balls to both sides. To make it stand up you could attach a lump of plasticine or play dough onto the end.
Will you be using your snowmen for imaginative play or as Winter decorations?
More Fun Winter Crafts To Enjoy: