

If your house is anything like ours, a craft supply you always have a surplus of is toilet paper rolls. Am I right? What is is with kids and TP? This 3D Cardboard Tube Heart Art is a great creative project to put them to good use and make something quite beautiful.
This simple heart art idea is a super way to introduce kids to art that isn’t flat! Working in three dimensions is very exciting and a simple art project like this can inspire kids to branch out and experiment a bit as their confidence grows.
Everyone will enjoy this 3D heart art displayed on the walls all year round and it’s also great as gifts too, especially for Valentine’s Day, Mother’s Day and Grandparents’ Day.
Here on Kids Craft Room we’ve got lots of other interesting heart crafts using different materials too. So before you get started on your 3D cardboard tube heart art why not save some ideas on Facebook or Pinterest to come back to try later. (Just click on the text link or photos below to go to the full posts and save to your social media from there.)
Washi Tape Heart Suncatchers look gorgeous and are great for fine motor skill development. Heart Candy is super easy and great as gifts for class mates. Edible Bread Painting is sure to become a favourite, it is so much fun and delicious! No Sew Heart Necklaces are quick and easy and perfect to make as gifts for friends.

Now grab a pile of TP rolls or kitchen paper tubes and let’s get the kids creating gorgeous heart art in 3D! They’ll love it!
3D Cardboard Tube Heart Art Tutorial
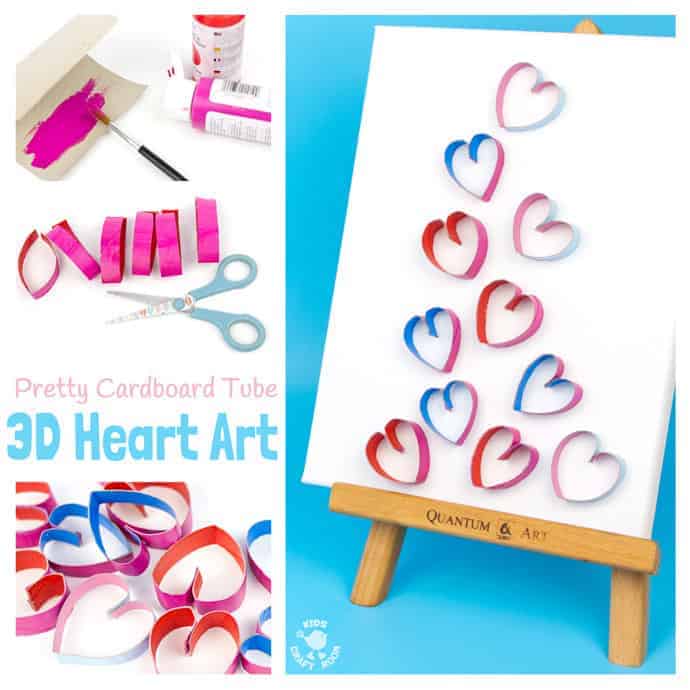
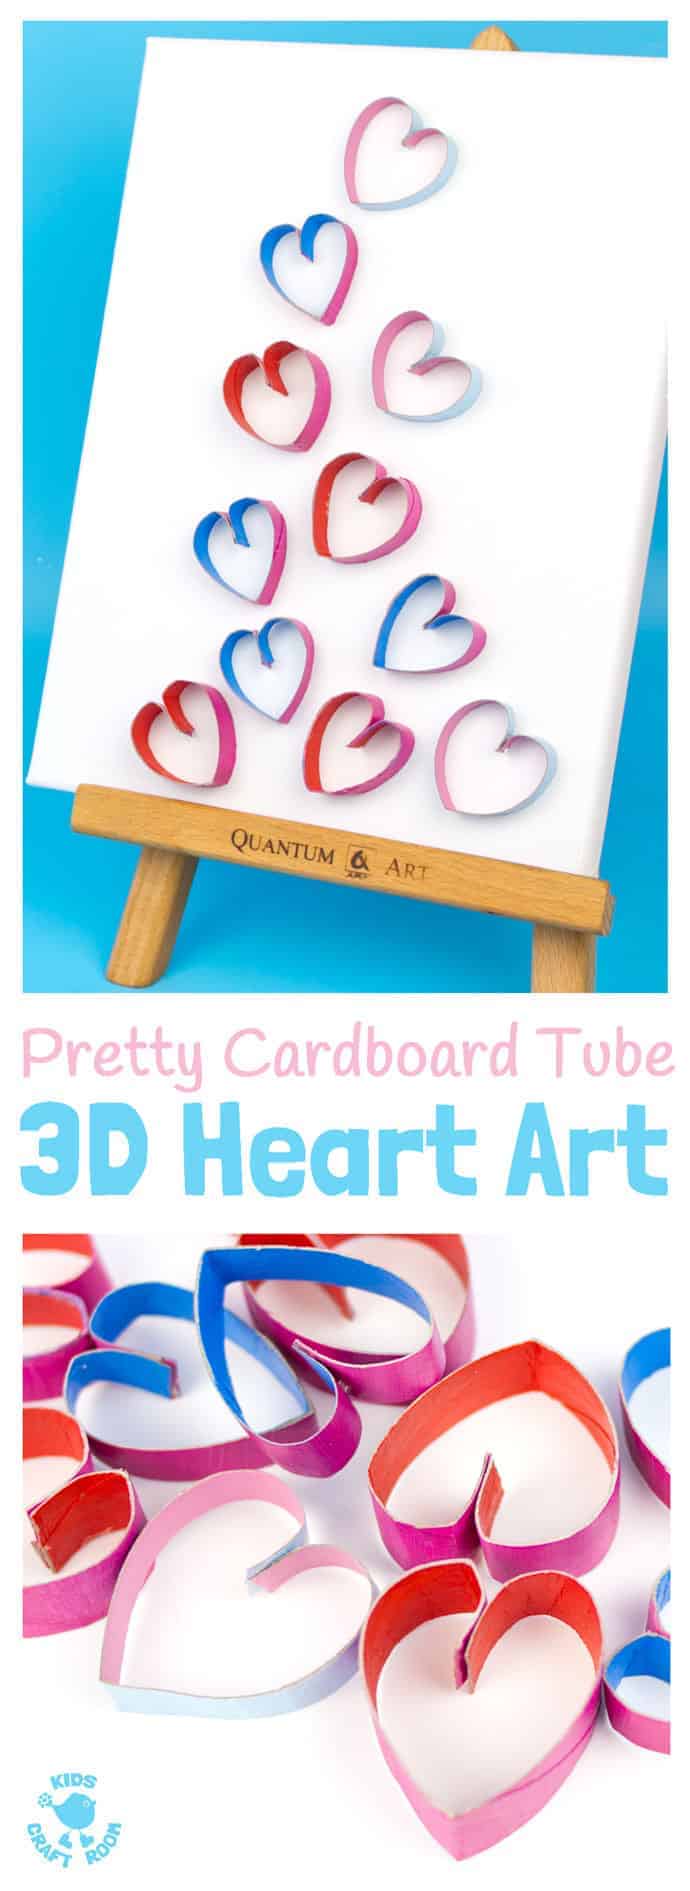
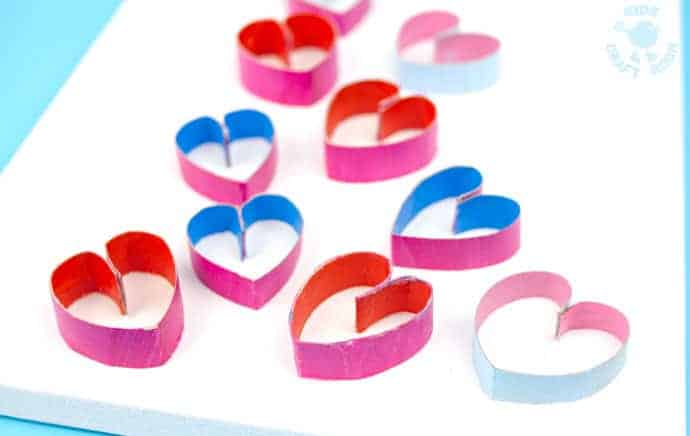
Don’t these TP roll hearts make a cute display when arranged together? Who’d have thought something so simple could be so effective?
For this tutorial we kept our hearts all the same thickness but children can enjoy experimenting with heart of different depths, colours and lay outs to create some really interesting 3D displays.
Supplies For A 3D Heart Art Project
How To Make 3D Cardboard Tube Heart Art
Stage One – Choosing Your Colours
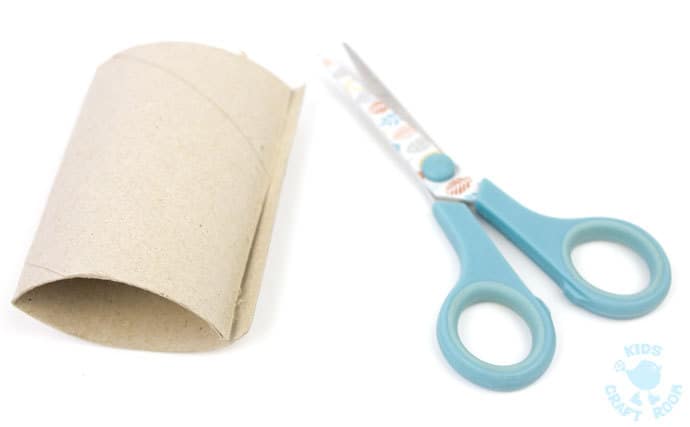
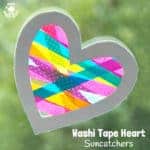
Start by preparing your cardboard tubes to make your hearts. Squash each TP roll in half lengthways making two creases. Cut along one of the creases to open out the tube.

Decide what colours you want your hearts to be. We painted three different tubes in three different ways using one paint colour on the outside and a different paint colour on the inside. We used acrylic paint because it has such good coverage and we only needed one coat.
(I suggest painting more tubes than you think you’ll need so that your children can experiment with different depths of 3D later.)
Stage 2 – Making Your 3D Cardboard Tube Hearts
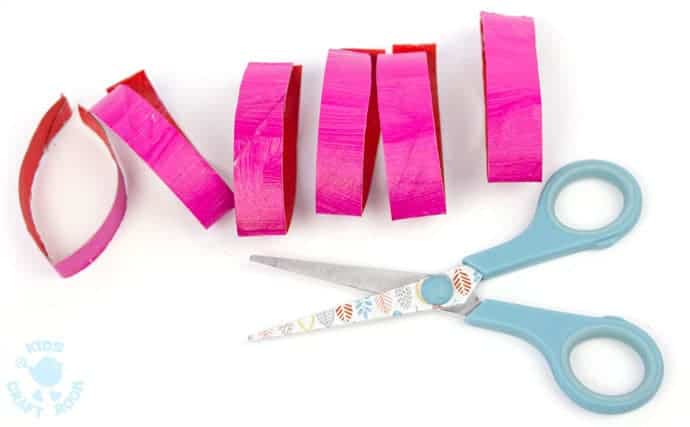
When your painted tubes are completely dry cut them into strips. For our 3D heart art we kept all our strips roughly the same thickness. The thicker the strips the more your hearts will protrude from the canvas. It is lovely to let the children experiment with this and explore the effect of different sized hearts.

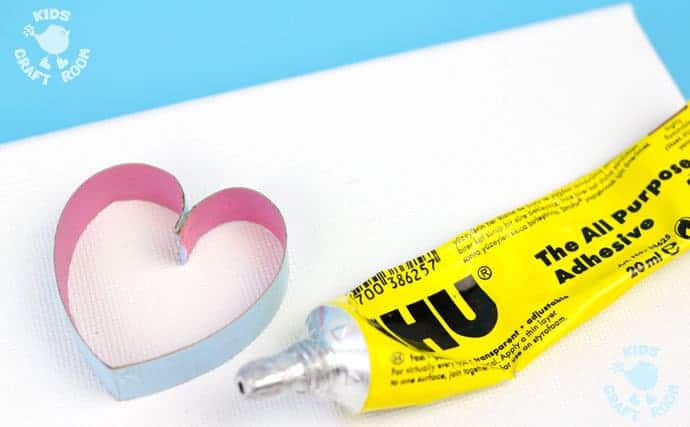
To turn your cardboard tubes into pretty hearts bend the cut ends together in the middle to make a heart shape. Dab on a little UHU glue to join the two ends together and hold them in place with a clothes pin while they dry.
Stage 3 – Designing Your 3D Cardboard Tube Heart Art
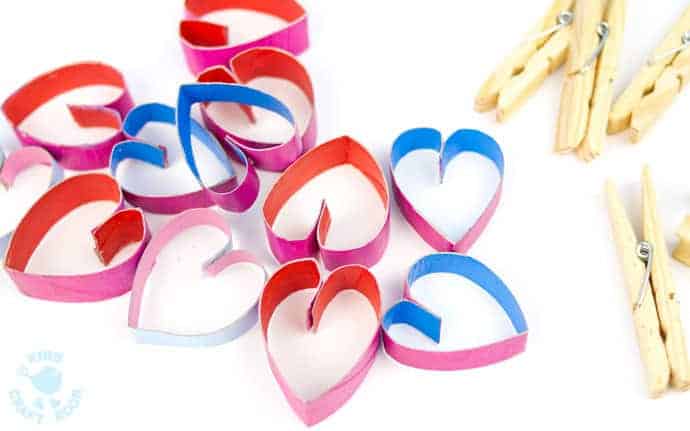
Once your cardboard tube hearts are dry remove the clothes pins and start thinking about the layout you want to choose.

We chose to use a cheap plain white canvas to work on but you could paint it if you prefer.
Don’t worry if you don’t have a canvas you can always use a piece of rigid card stock instead.
I like to encourage the children to lay out their hearts on the canvas and explore different patterns and random layouts, symmetrical and unbalanced etc. They can also explore different colour combinations and if they’ve made hearts in different thicknesses they can explore a range of 3D effects too and the impact of shadows on their final piece.
When you are happy with the lay out of your hearts, lift up one at a time and apply a thin layer of UHU glue along one edge and stick it in its chosen place on the canvas.
If I was doing this with very young children then I would choose to use white glue like Elmer’s that dries clear and apply the glue all over the canvas instead.
Work your way around your heart art canvas gluing each pretty heart in place.
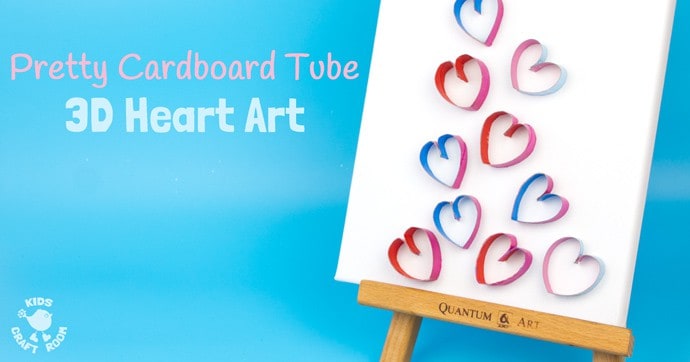
It’s lots of fun for kids to work in 3 dimensions and this 3D Cardboard Tube Heart Art is an easy first project that looks great.We displayed our finished art on a table top easel for now but I’ll be adding it to our wall gallery later too. I love that it makes use of recycled materials too so it’s super thrifty!
Are you making 3D Heart Art to give as gifts or for your own home?
You can print the love valentine craft instructions below.
More Fun Valentine Crafts For Kids:


3D Cardboard Tube Heart Art
Materials
- Cardboard Tubes
- Stretched Canvas
- Acrylic Paint
- UHU Glue
- Clothes Pins
Instructions
- Squash each TP roll in half lengthways making two creases. Cut along one of the creases to open out the tube.
- Paint your tubes inside and out.
- When your painted tubes are completely dry cut them into strips.
- To turn your cardboard tubes into pretty hearts bend the cut ends together in the middle to make a heart shape. Dab on a little UHU glue to join the two ends together and hold them in place with a clothes pin while they dry.
- Once your cardboard tube hearts are dry remove the clothes pins
- Lay your hearts onto the canvas and glue them into place.