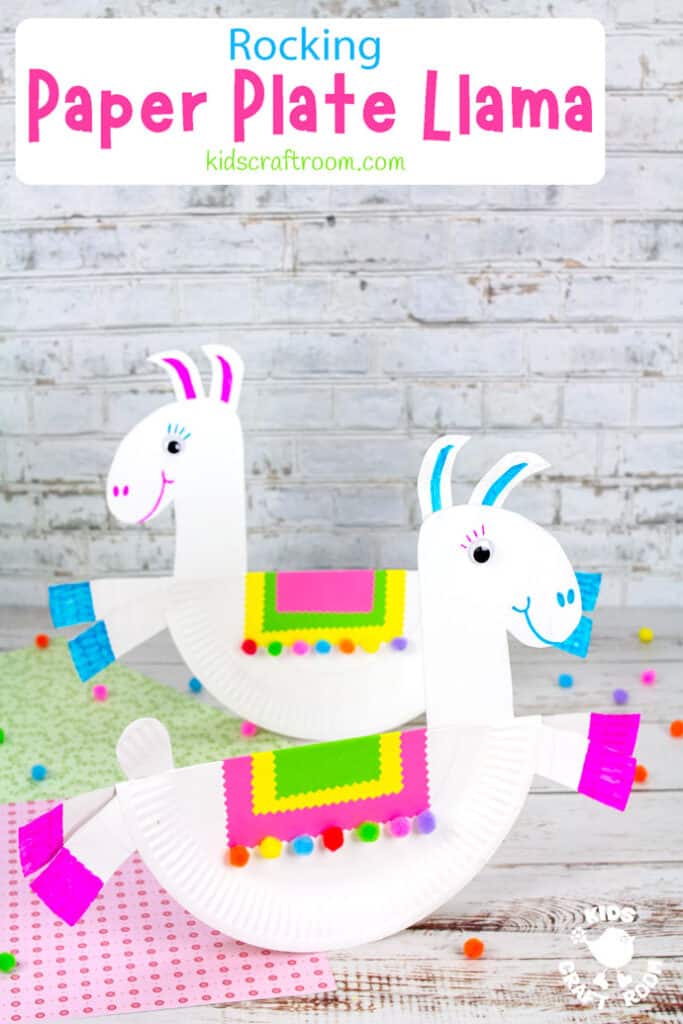
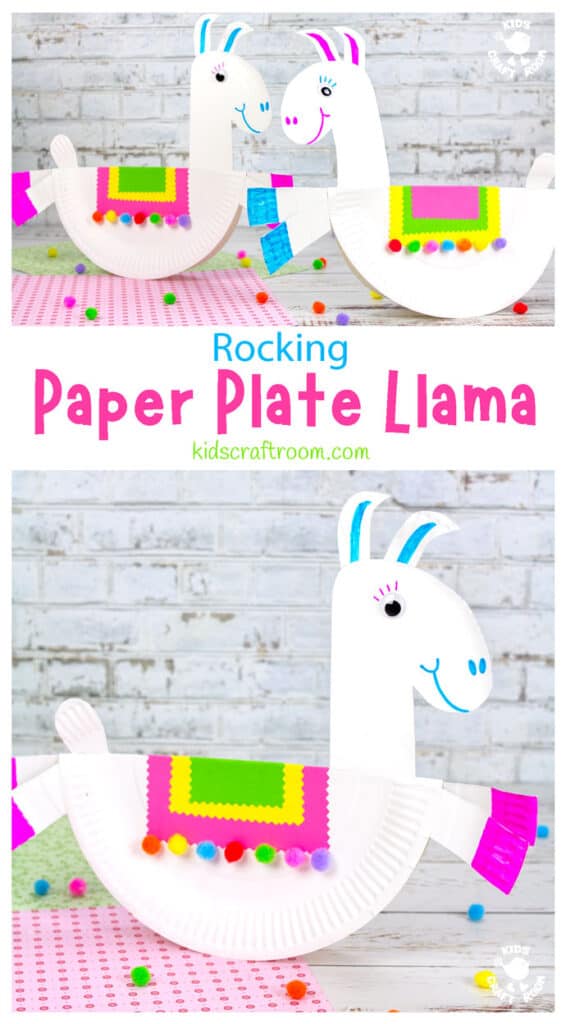
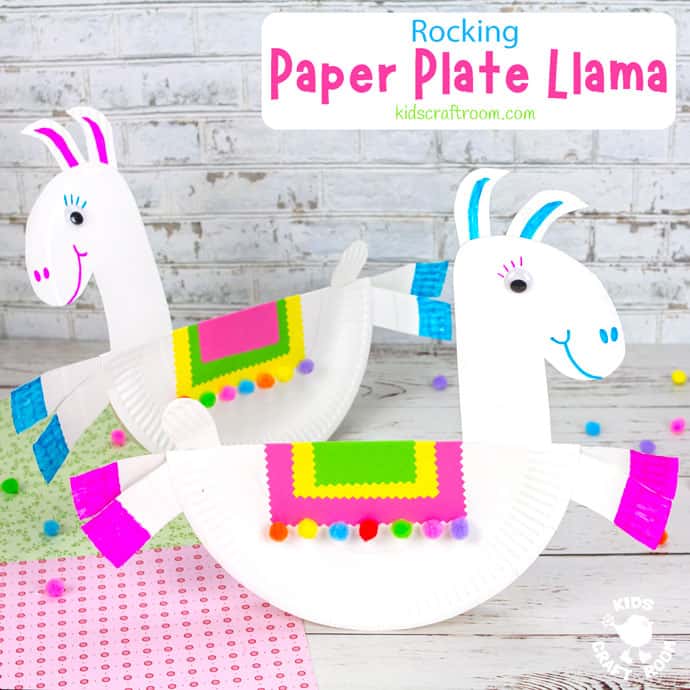
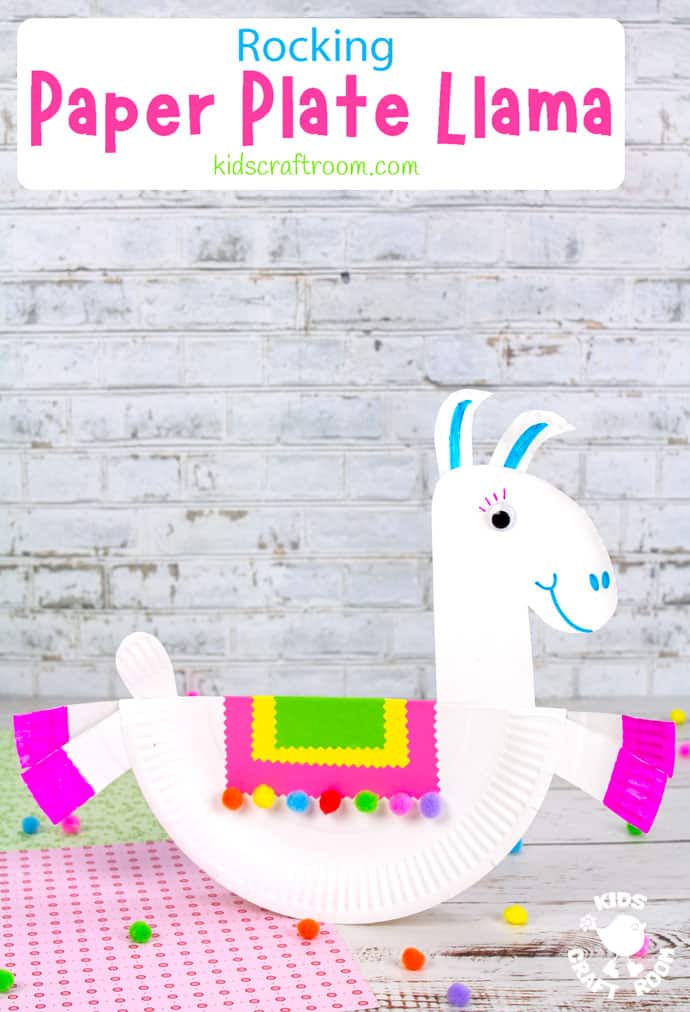
Are you as totally besotted with llama crafts as we are? What is it about these furry creatures that makes them so darn irresistible? Today we’re ramping up the llama cuteness with this ROCKING PAPER PLATE LLAMA CRAFT. If you weren’t a full llama fan before now, you will be by the time you’ve made these. JUST. SO. ADORABLE!
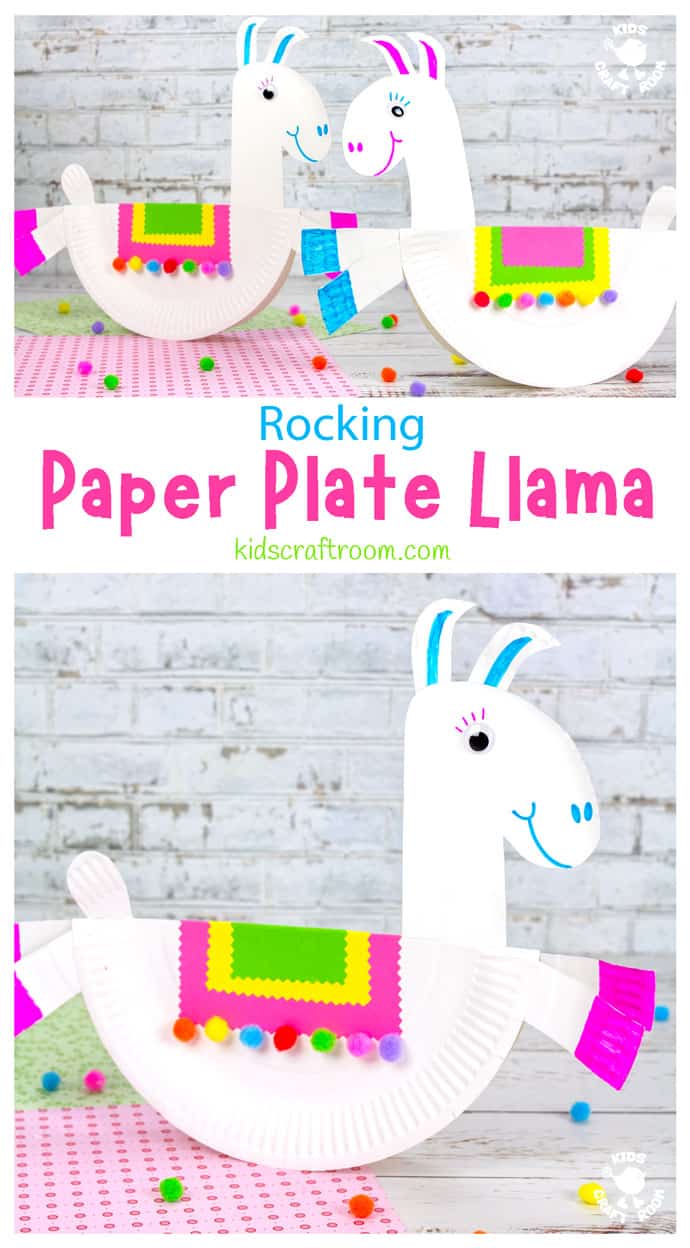
Each Rocking Llama is made from two standard paper plates and paper scraps so it’s a super frugal craft and great for classroom or summer camps.
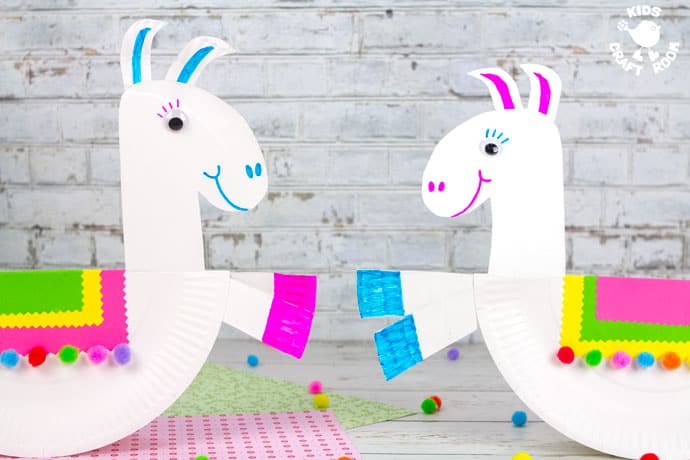
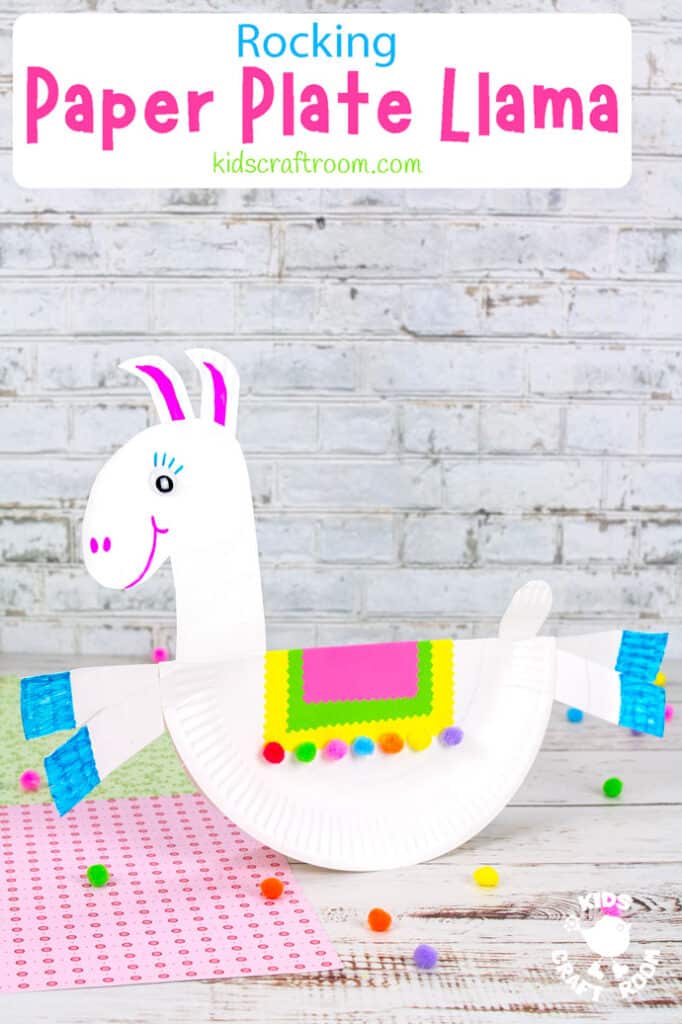
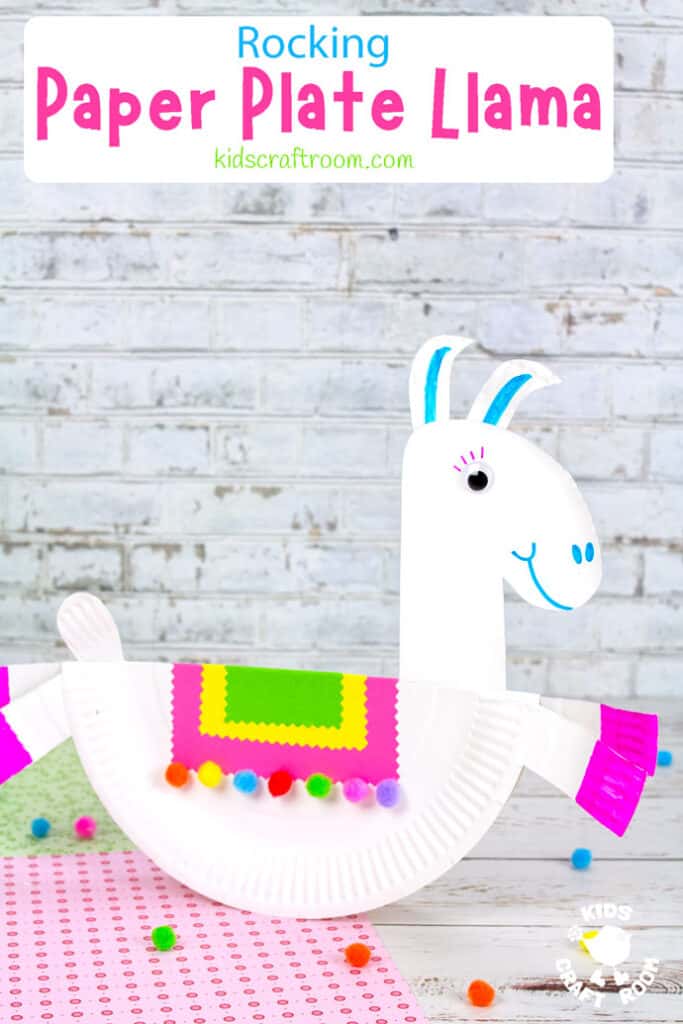
The paper plate llamas stand up with the legs stretched out in front and behind them. They remind me a bit of carousel ponies! When you tap their heads or tails they gently rock from side to side, with characterful cuteness!
If you want even more llama crafting goodness, you’ll love our Paper Plate Llama Heads too. And how about making a Paper Cactus to help them feel right at home?
Rocking Paper Plate Llama Craft Tutorial
Supplies To Make Rocking Llamas:
- Paper Plates
- Coloured Paper
- Mini Pom Poms
- Wiggle Eyes
- Small Coin
- Marker Pens
- Sticky Tape
- Glue
- Scissors
How To Make Rocking Paper Plate Llamas
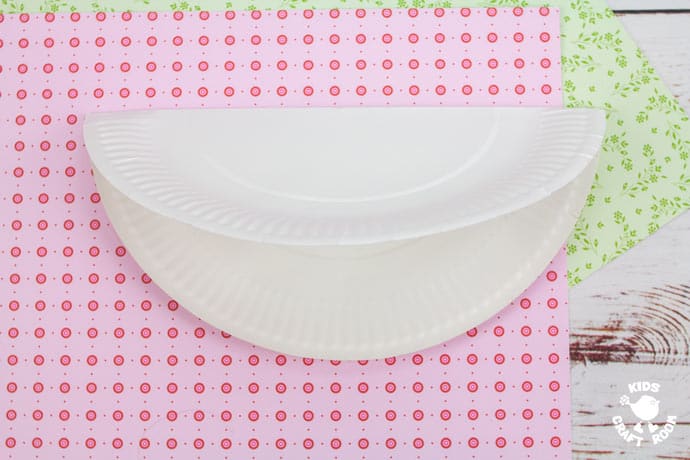
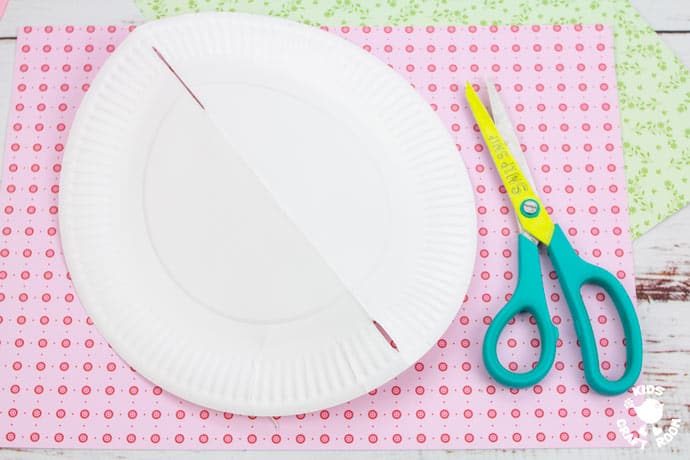
1 – Fold a white paper plate in half to make the llama’s body.
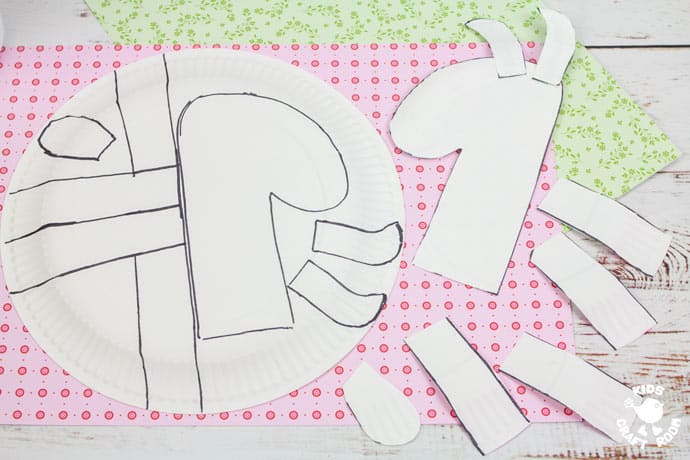
2 – On the back of another paper plate sketch out a head, ears, tail and four rectangle legs. Use the image above as a guide. (If you prefer you could always cut them from cardstock instead.)
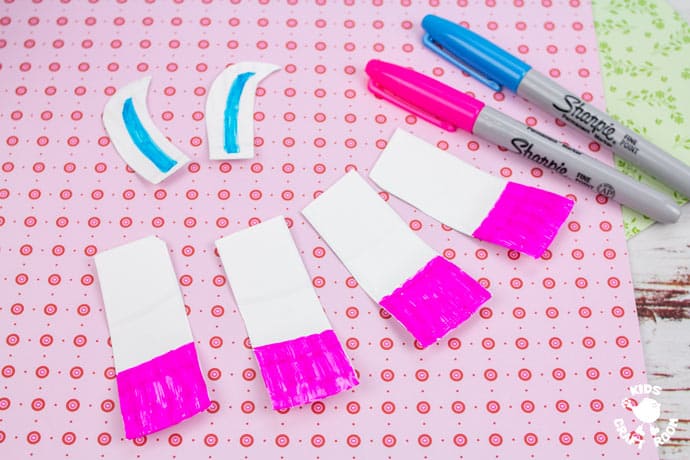
3 – Cut out the llama body parts and colour in the feet and inner ears with marker pens.
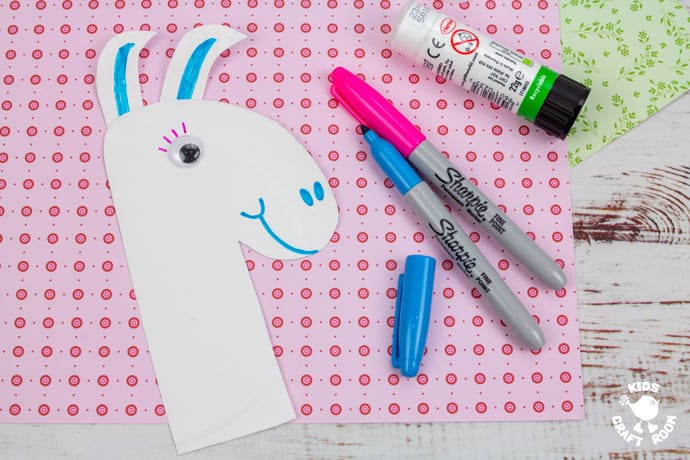
4 – Glue the ears to the head and then glue on a wiggle eye and draw eyelashes, nostrils and a smile.
5 – Along the fold of the body paper plate cut a very thin hole at one end for the head and for the tail at the other end.
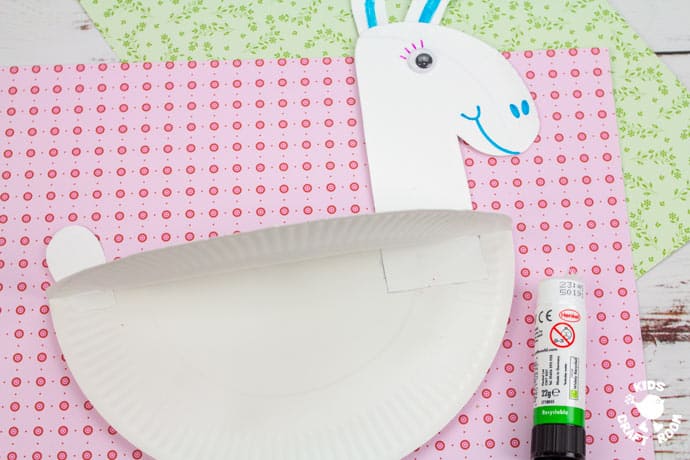
6 – Push the head and tail through the slots and glue them into place.
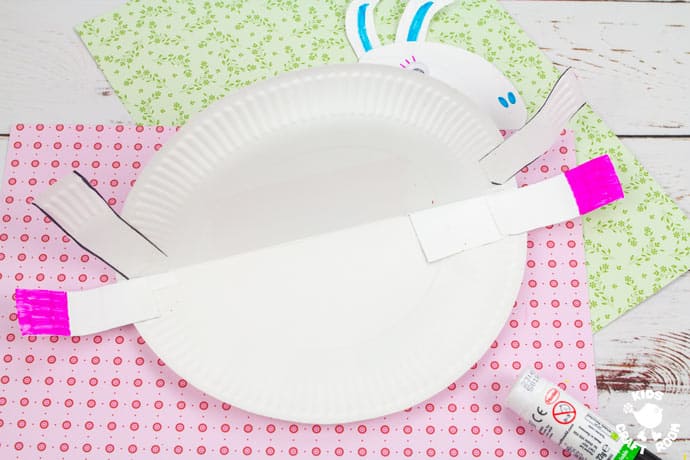
7 – Open up the body and glue two legs onto the back poking out and two legs onto the front poking out. You want to keep them as close to the fold as you can.

8 – To make a blanket for the llama’s back cut three rectangles of coloured paper, each smaller than the next. We used pinking shears to give a lovely zig-zag edge.
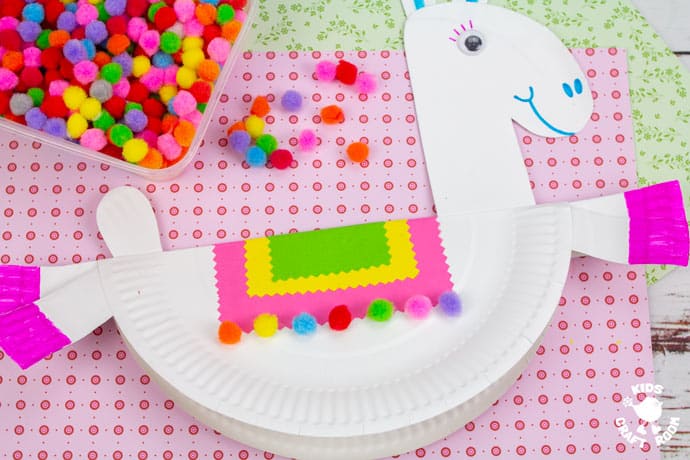
9 – Fold the coloured rectangles in half across the fold in the paper plate body and glue them in place, one on top of the other. Add a trim of mini pom poms.
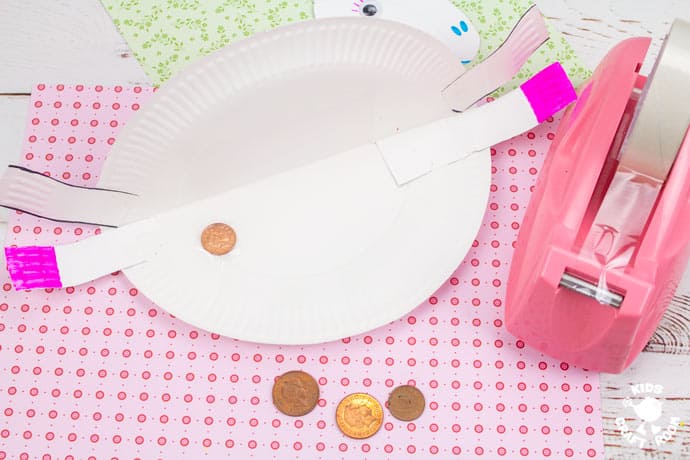
9 – Because the llama’s head is heavier than its tail it won’t yet balance when you try to stand it up. An easy remedy is to sticky tape a small coin or similar onto the inside at the tail end.

Now you can stand your rocking paper plate llama craft up and give it a gentle tap to set it in motion! So fun!
You can print the llama craft instructions below.
More Fun Summer Crafts To Try:

Rocking Paper Plate Llama Craft
Make adorable rocking paper plate llamas. They are so cute and fun!
Materials
- Paper Plates
- Coloured Paper
- Mini Pom Poms
- Wiggle Eyes
- Small Coin
- Marker Pens
- Sticky Tape
- Glue
- Scissors
Instructions
- Fold a white paper plate in half to make the llama’s body.
- On the back of another paper plate sketch out a head, ears, tail and four rectangle legs. Use the image above as a guide. (If you prefer you could always cut them from cardstock instead.
- Cut out the llama body parts and colour in the feet and inner ears.
- Glue the ears to the head and then glue on a wiggle eye and draw eyelashes, nostrils and a smile.
- Along the fold of the body paper plate cut a very thin hole at one end for the head and for the tail at the other end.
- Push the head and tail through the slots and glue them into place.
- Open up the body and glue two legs onto the back poking out and two legs onto the front poking out. You want to keep them as close to the fold as you can.
- To make a blanket for the llama’s back cut three rectangles of coloured paper, each smaller than the next. We used pinking shears to give a lovely zig-zag edge.
- Fold the coloured rectangles in half across the fold in the paper plate body and glue them in place, one on top of the other. Add a trim of mini pom poms.
- Because the llama’s head is heavier than its tail it won’t yet balance when you try to stand it up. An easy remedy is to sticky tape a small coin or similar onto the inside at the tail end.