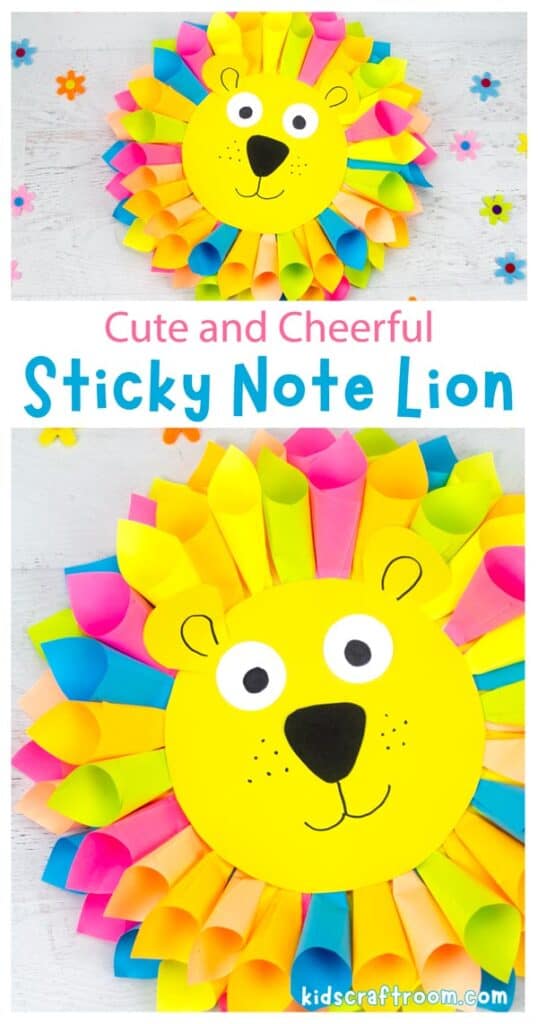
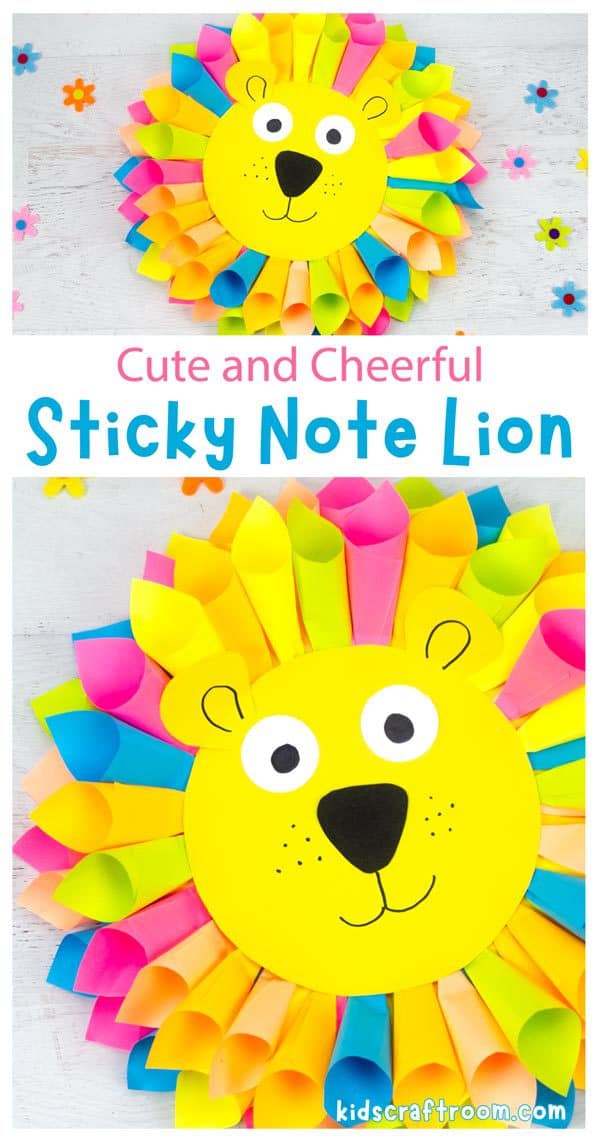
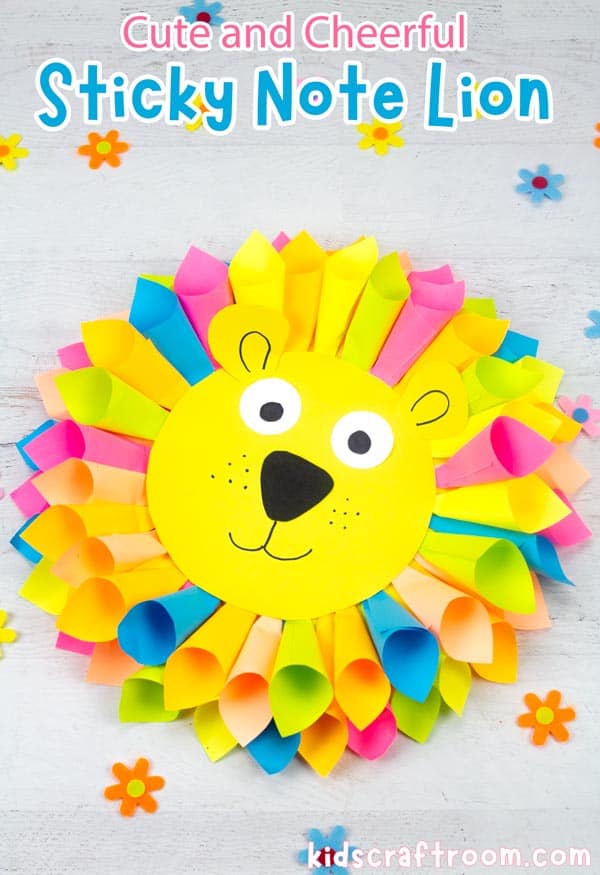
Do you want to learn how to make a gorgeous STICKY NOTE LION CRAFT with your kids? It’s so easy! All you need are some sticky notes and a little bit of creativity! In this tutorial, we’ll show you how to have fun together creating this colourful lion in just a few simple steps.
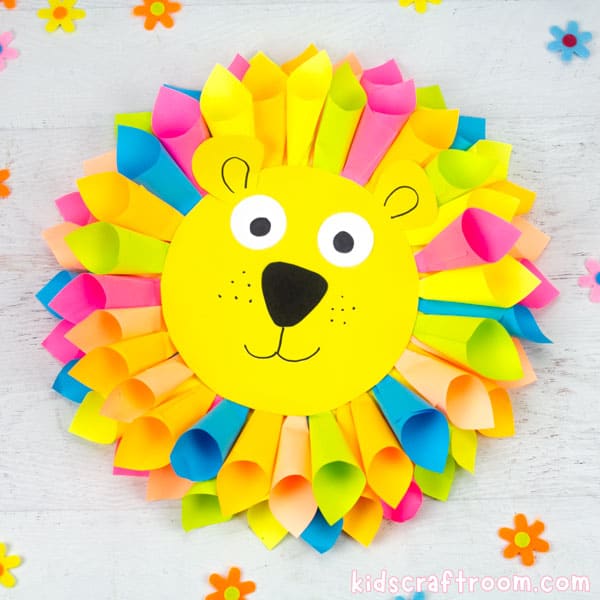
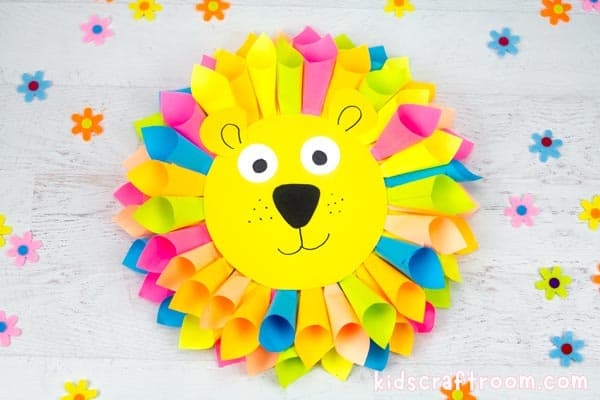
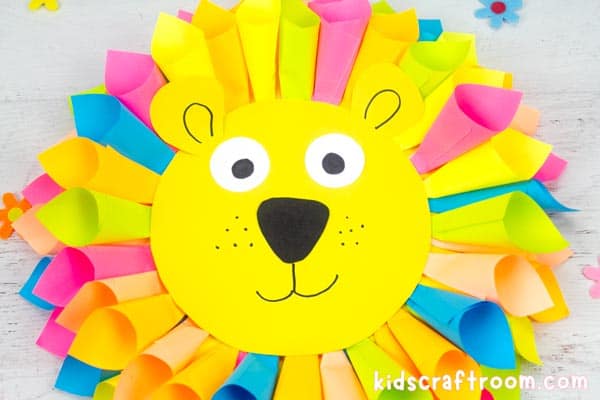
These sticky note lions are so bright and colourful and are actually quite large. They really make a statement displayed on the wall and are a wonderful way to decorate the home or classroom. Your kids will love learning how to make this fun and easy lion craft, and I’m sure they’ll be so proud to show it off to friends and family.
We displayed our lions on the wall but you could also glue them to a stick to make lion puppets to go with story time. Or how about cutting out the eyes to make gorgeous lion masks for dramatic play too?
This lion craft is made from rolled sticky notes so it’s a great activity for building fine motor skills and hand eye co-ordination. Why not team it up with learning about these magnificent animals for a creative and educational activity that your kids will love?
These sticky note lions are lots of fun and very easy to make. Grab your sticky notes and follow our step by step instructions below. Your kids are going to love making this adorable lion craft! Let’s get started!
Let’s Make Colourful and Fun Sticky Note Lions
Lion Craft Supplies:
- Yellow Cardstock
- Colourful Sticky Notes
- White Paper
- Marker Pen
- Scissors
- Glue
How To Make a Sticky Note Lion Craft
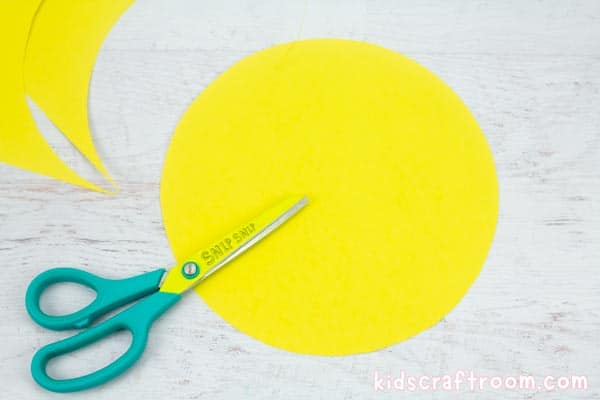
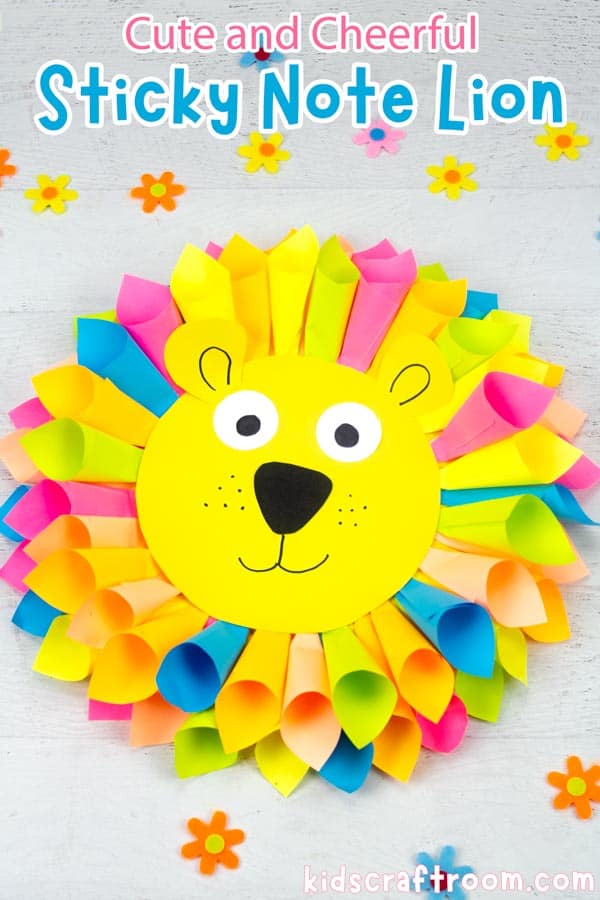
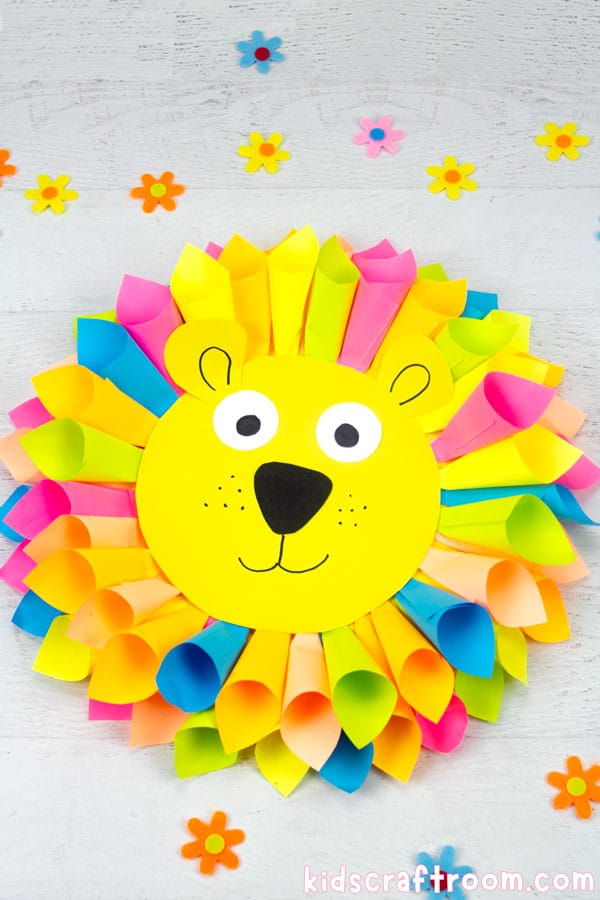
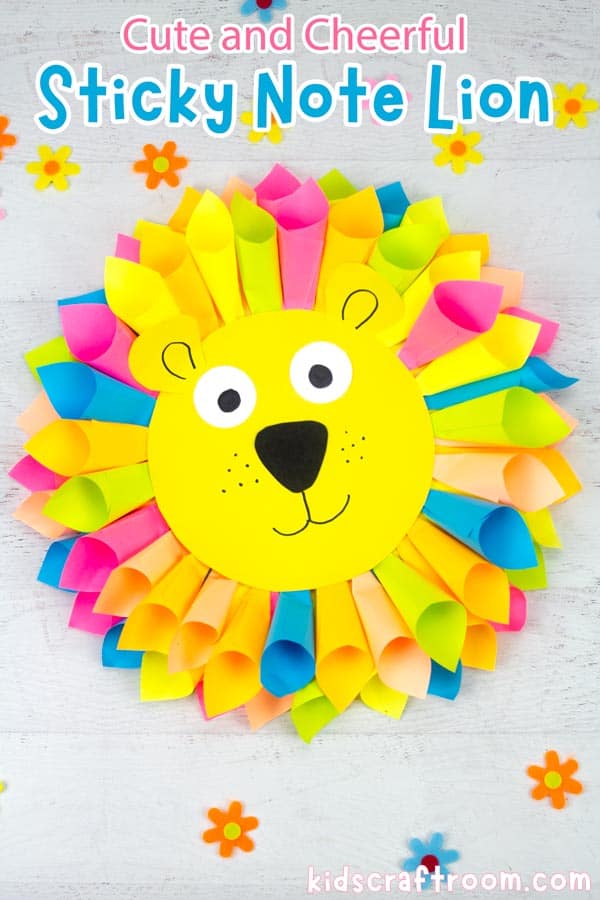
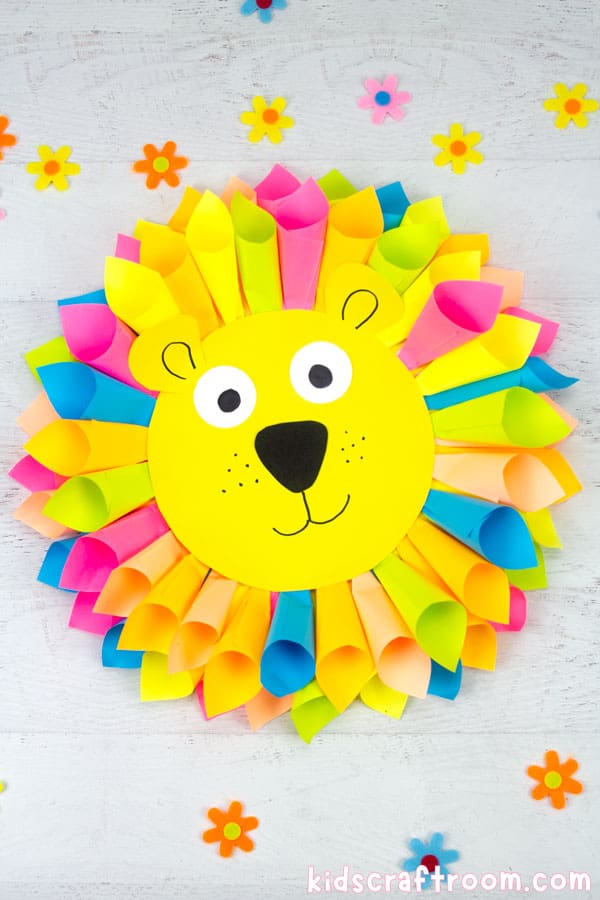
1 – Cut out a large yellow cardstock circle. This can be any size you like. Ours was about the size of a dinner plate. (You can use an old cardboard box if you prefer because it won’t show as it’s the back of the lion.)
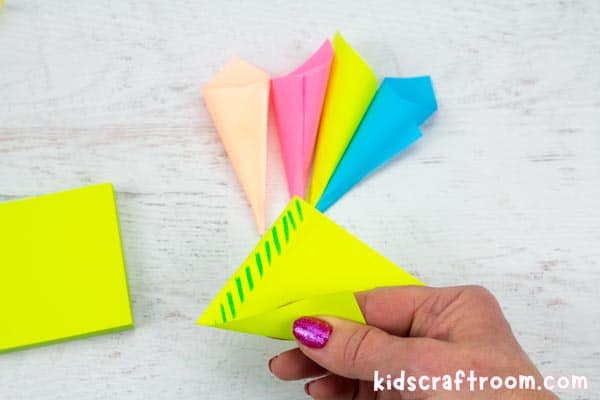
2 – The lion’s mane is made from rolled sticky notes. In the photo above, I’ve put marker pen on the glue strip so you can see how to orientate your sticky note. Put your index finger along the diagonal of the sticky note. Curl up the bottom and hold it with your thumb.
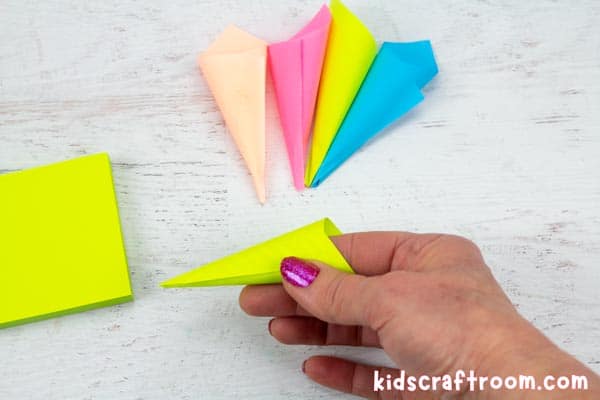
3 – Then curl over the glued edge to make a cone.
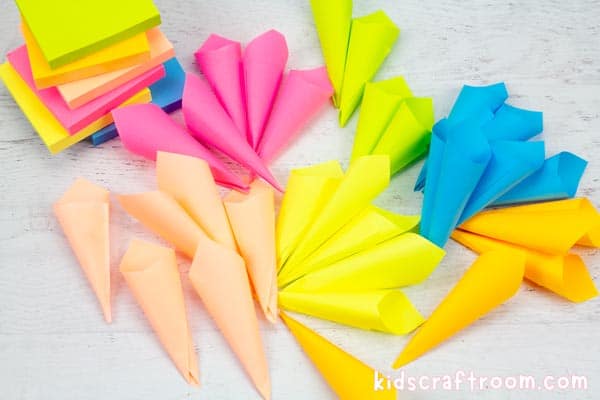
4 – We found it easiest to make lots of sticky note cones all at once. We used about 60 for our lion. It sounds like a lot but once you get the hang of it they only take seconds to roll.
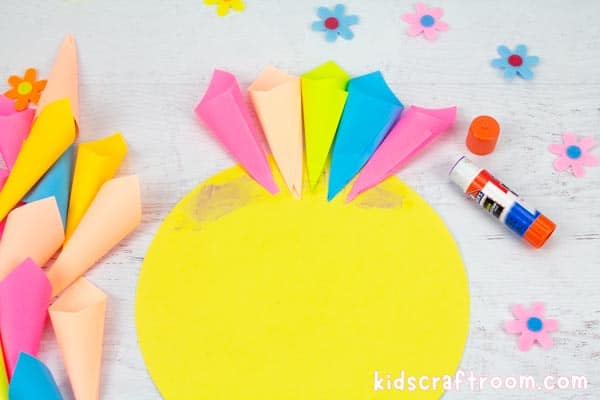
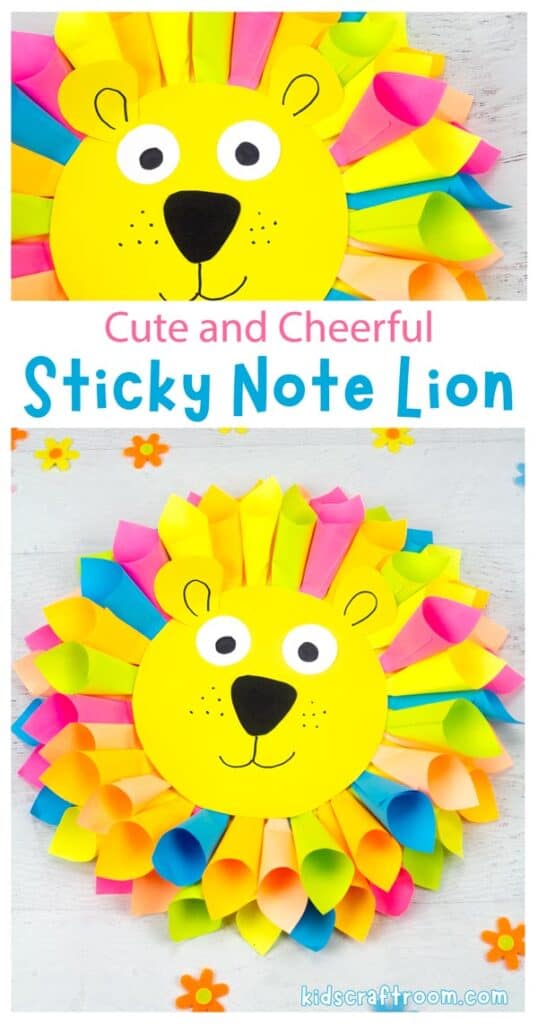
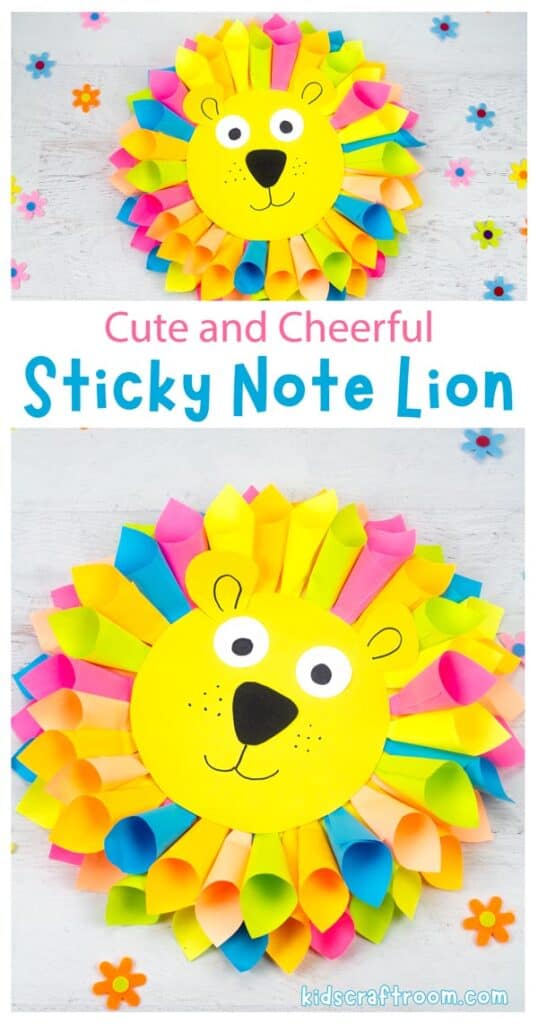
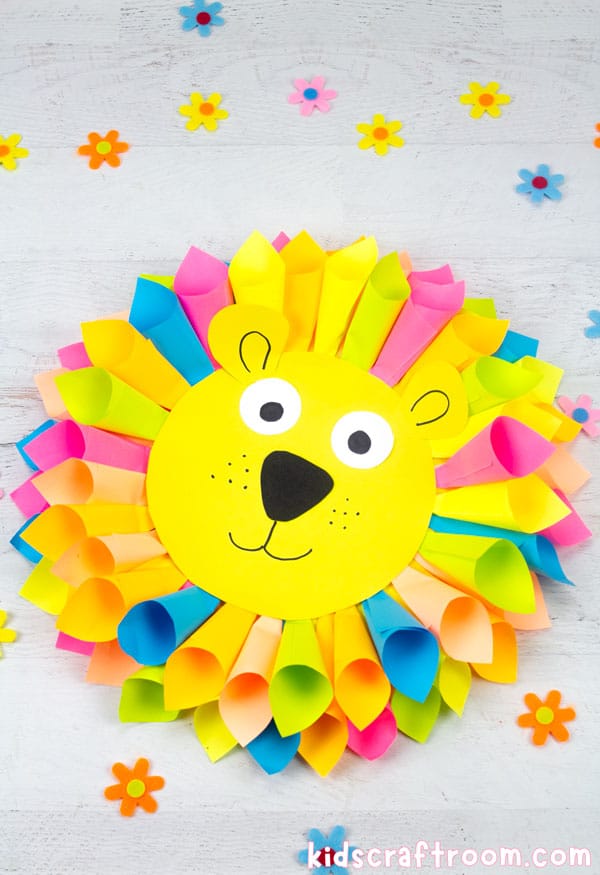
5 – To make the lion’s mane, glue the pointed ends of the rolled up sticky note cones, all around the outer edge of the circle.
6 – Keep gluing on the rolled sticky notes until you’ve gone right around the circle. This is the outer edge of the mane.
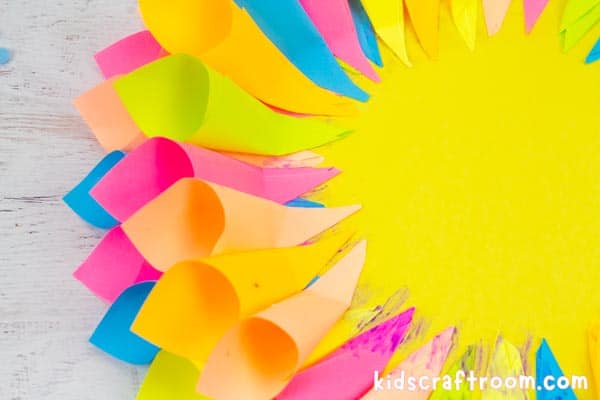
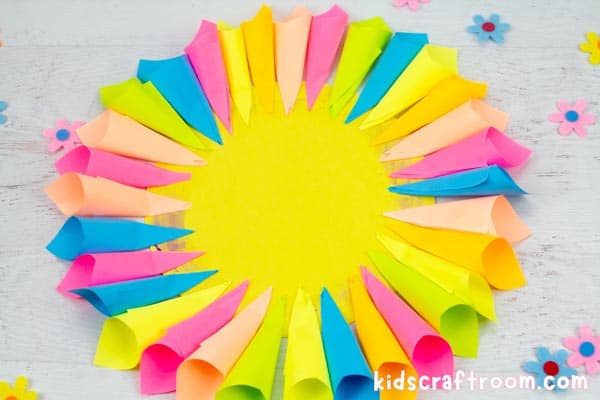
7 – Now repeat the process with another ring of rolled sticky notes. Glue them slightly inside the first ring, to give a double layer. (We made our lion’s mane with two rows of sticky notes but you could add more or less as you please.)
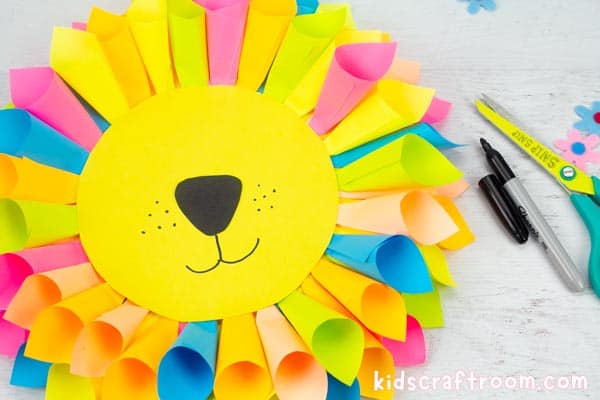
8 – Once you’ve finished your mane, cut another yellow cardstock circle the right size to fit inside the ring and glue it in place. Draw on a nose and happy smile.
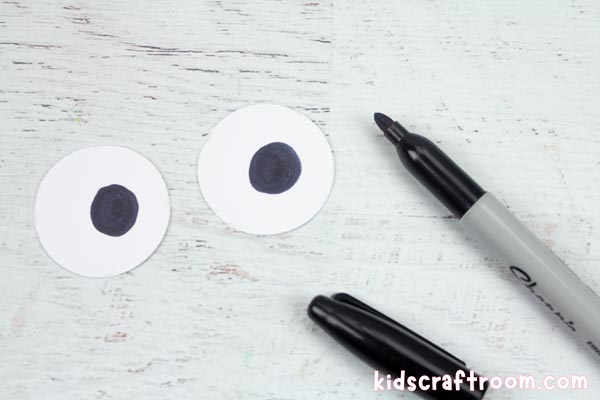
9 – Cut out two white round eyes from paper and draw on black pupils.
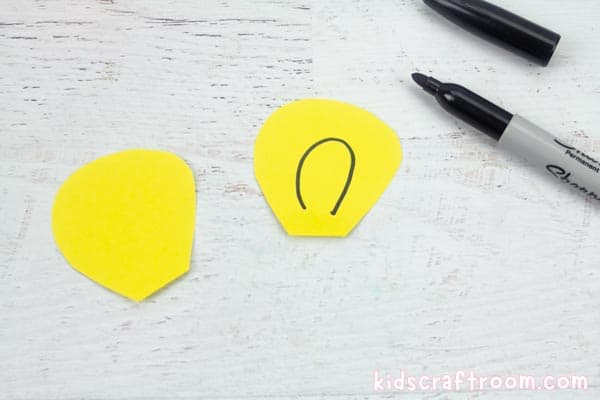
10 – Cut out two yellow cardstock ears and draw on an inner ear shape.
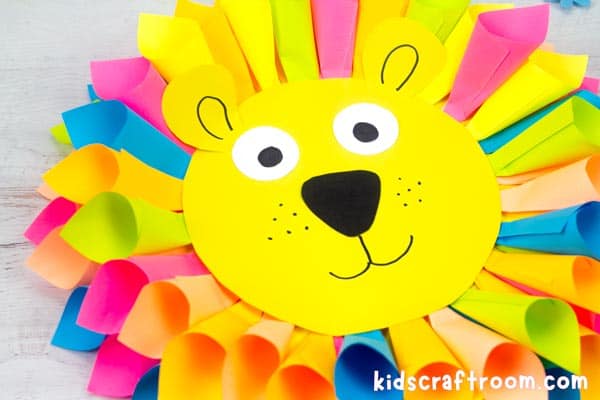
11- Finish off your colourful sticky note lion by gluing on the eyes and ears. Isn’t he just ROARSOME!

We absolutely fell in love with our handsome lions and hope you have as much fun with this craft idea as we did.
You might like these other lion craft ideas:
More Fun Animal Crafts To Enjoy:

How to Make a Sticky Note Lion Craft for Kids

Materials
- Yellow Cardstock
- Colourful Sticky Notes
- White Paper
- Marker Pen
- Scissors
- Glue
Instructions
- Cut out a large yellow cardstock circle. This can be any size you like. Ours was about the size of a dinner plate. (You can use an old cardboard box if you prefer because it won’t show as it’s the back of the lion.
- Put your index finger along the diagonal of the sticky note. Curl up the bottom and hold it with your thumb.
- Then curl over the glued edge to make a cone.
- We found it easiest to make lots of sticky note cones all at once. We used about 60 for our lion. It sounds like a lot but once you get the hang of it they only take seconds to roll.
- To make the lion’s mane, glue the pointed ends of the rolled up sticky note cones, all around the outer edge of the circle.
- Keep gluing on the rolled sticky notes until you’ve gone right around the circle. This is the outer edge of the mane.
- Now repeat the process with another ring of rolled sticky notes. Glue them slightly inside the first ring, to give a double layer. (We made our lion’s mane with two rows of sticky notes but you could add more or less as you please.)
- Once you’ve finished your mane, cut another yellow cardstock circle the right size to fit inside the ring and glue it in place. Draw on a nose and happy smile.
- Cut out two white round eyes from paper and draw on black pupils.
- Cut out two yellow cardstock ears and draw on an inner ear shape.
- Finish off your colourful sticky note lion by gluing on the eyes and ears. Isn’t he just ROARSOME!