
Spring is in the air, and Easter is just around the corner so what better way to celebrate than with a craft that’s lots of fun and also teaches kids about a beautiful Native American tradition? Join us to turn a boring paper plate into a super cute DIY Easter Bunny Dream Catcher Craft!
Dream Catchers are lots of fun to make at any time of year and this DIY dreamcatcher project is super fun with its seasonal Easter Bunny theme!

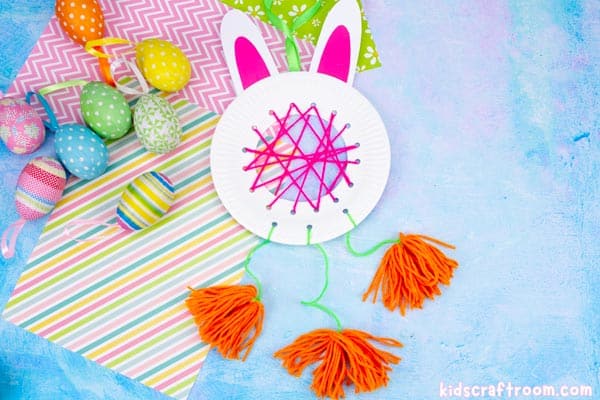
Easter Bunny DIY Dreamcatcher Craft
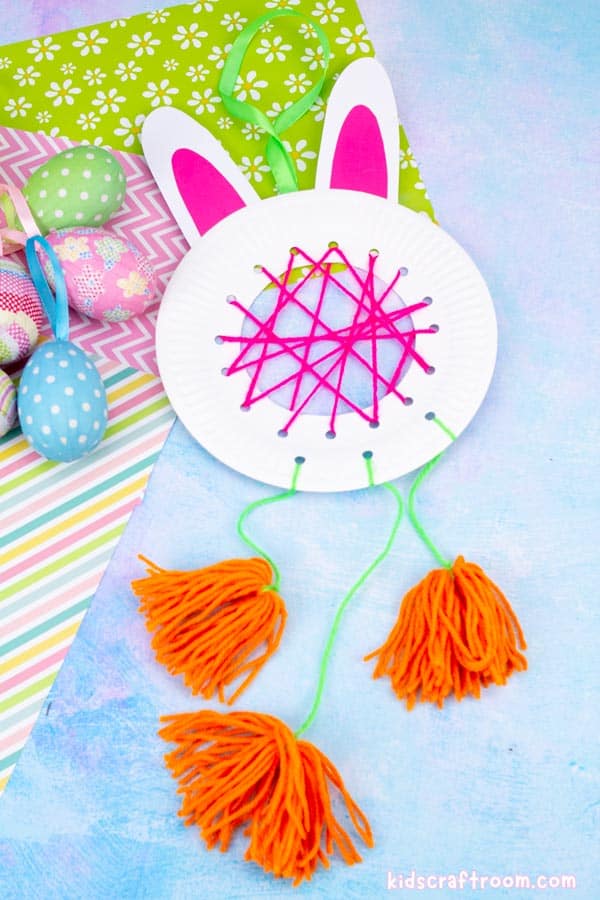
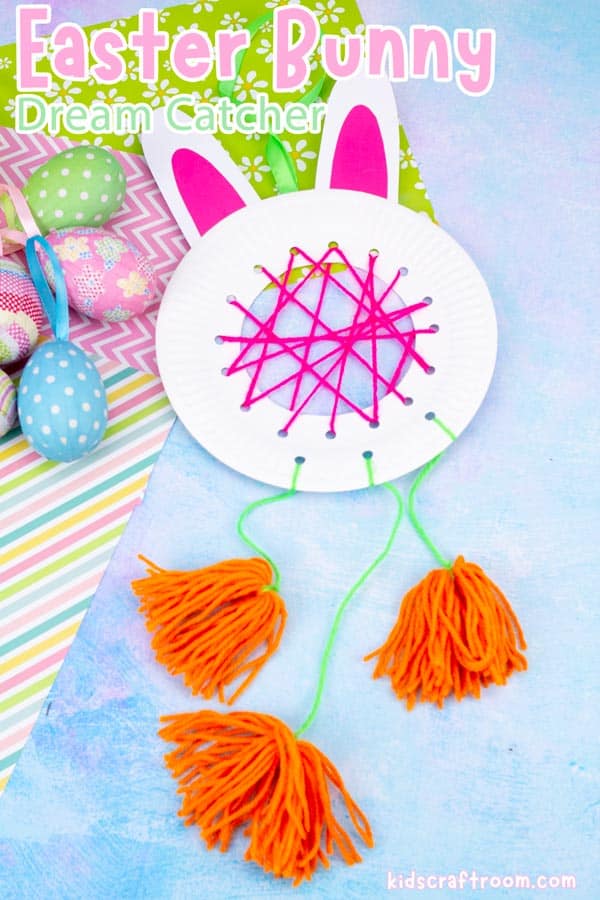
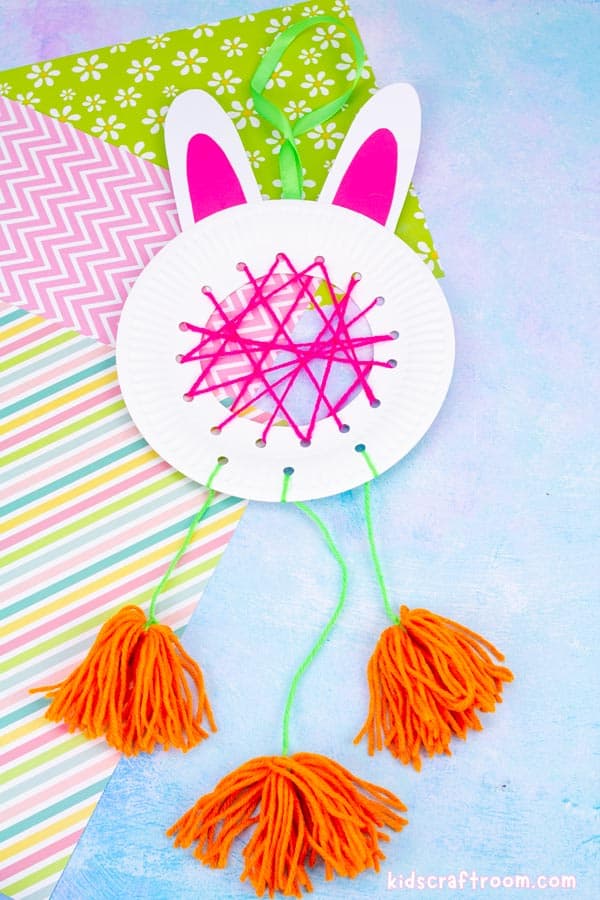
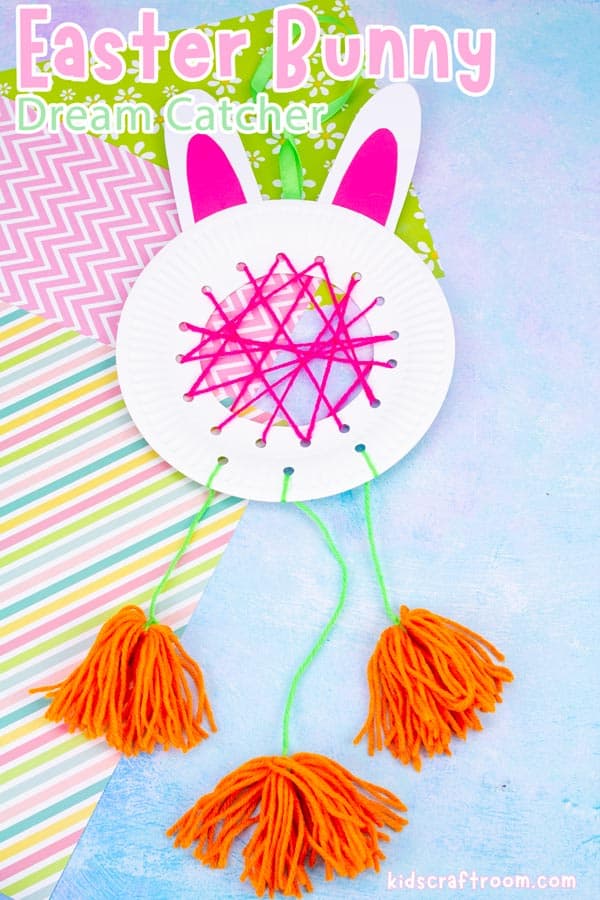
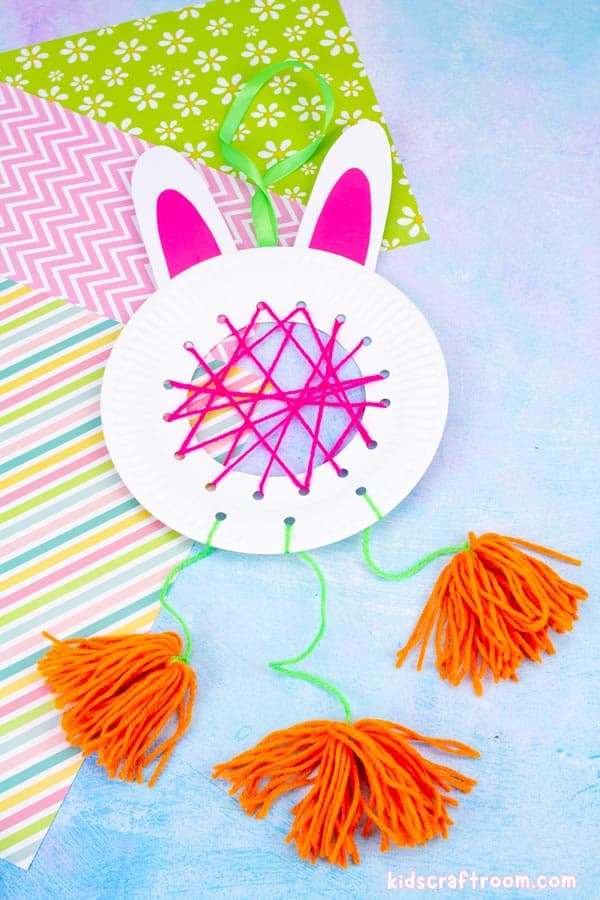
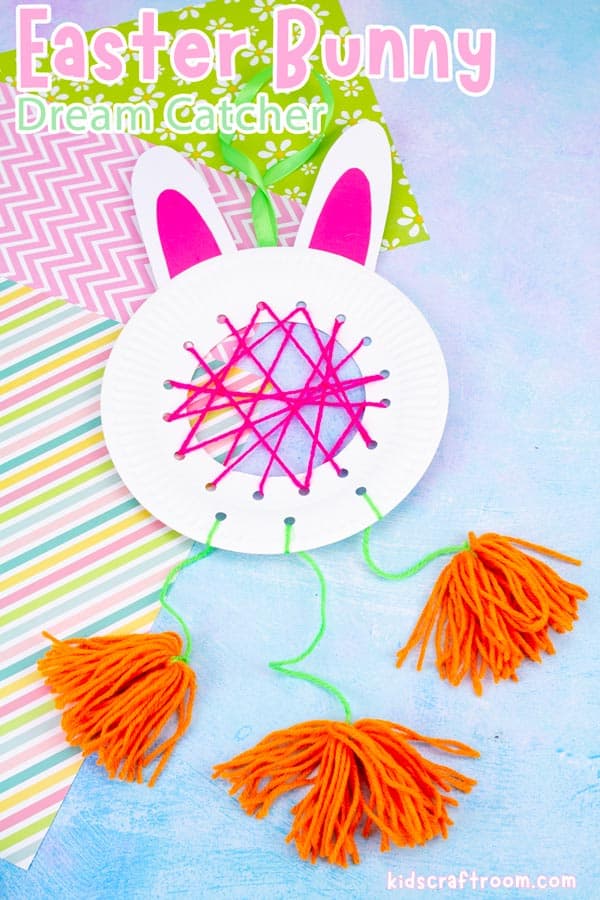
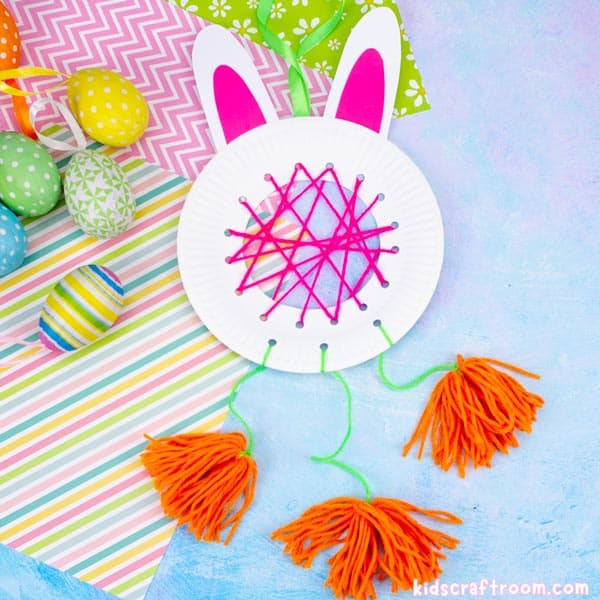
Our Easter Bunny Dream Catcher Craft is super easy to make and looks super cute too!
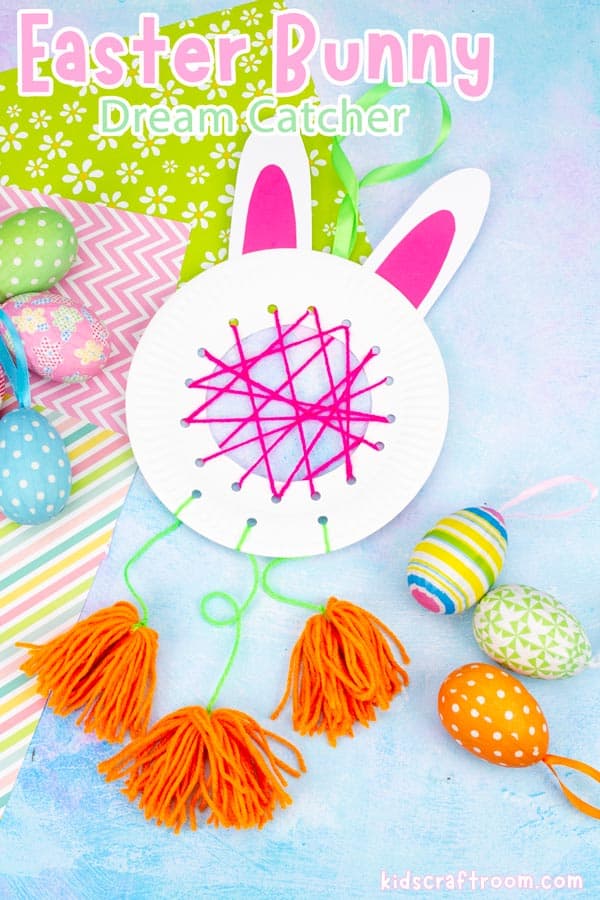
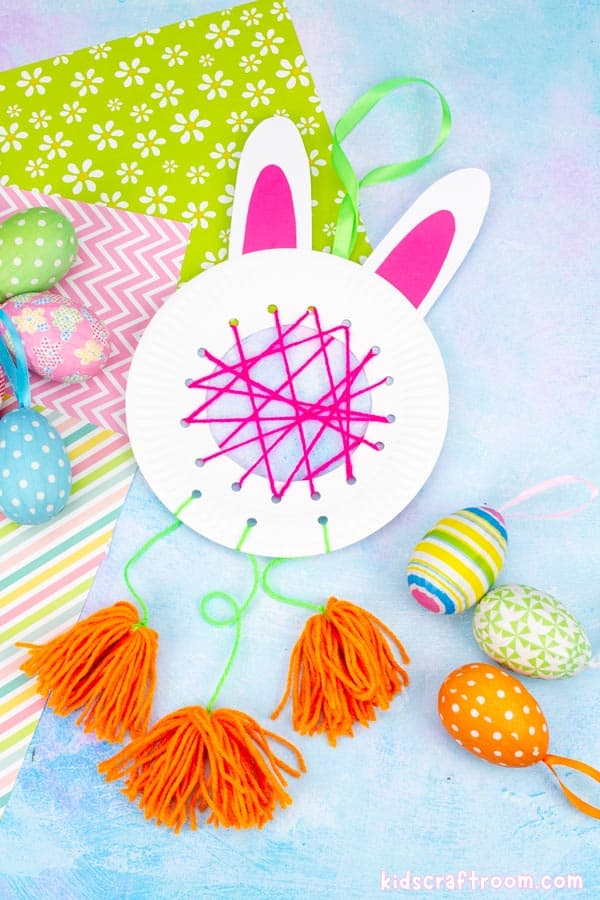
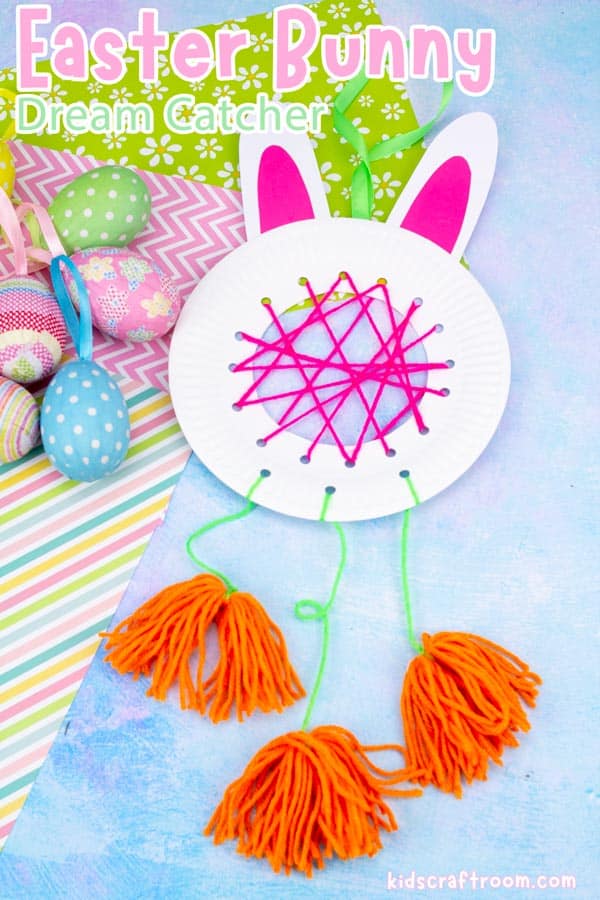
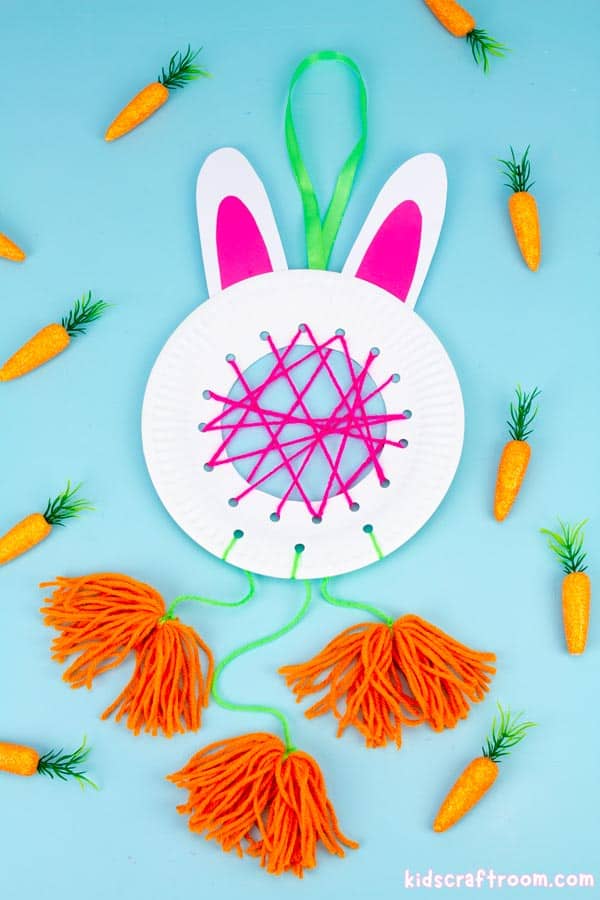
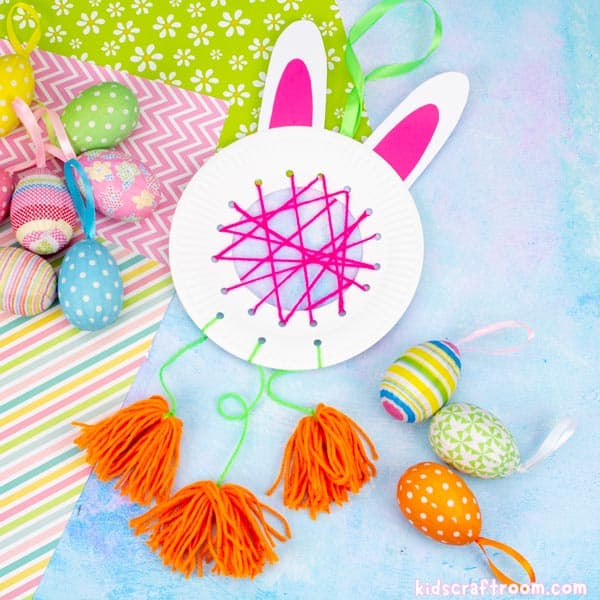
This easy craft has big pink bunny ears and a whole bunch of cute carrot pom poms dangling down from the bottom. It’s the perfect craft for spring and a fun way to make some cute Easter decor for your home or classroom.
Hopping Into History – The Origin of Dream Catchers
The traditional dream catcher has a fascinating and magical history. Originating from a really old tradition in Native American culture, specifically the Ojibwe people, super special webs, which we call traditional dream catchers, were made to protect people from bad dreams that floated in the night air while they slept.
Native Americans made these traditional dream catchers from willow hoops. Inside the hoop they’d weave a special net or web in various colors. Then, dangling down from the bottom of the dream catcher they would add long threads decorated with gorgeous feathers and wooden beads.
They believed these special webs would catch dreams. The bad dreams would be trapped in the net but the good dreams would slip down to the bottom of the hoop, along the threads and feathers to reach you while you slept.

Adding an Easter Twist to Your Dream Catcher
Today’s DIY project, inspired by the beautiful dream catchers of Native Americans, is to create our own dream catcher craft with an Easter twist!
This DIY dreamcatcher craft is a creative spin on the age-old concept. With just a few simple materials, kids can have lots of fun making easy dreamcatchers perfect for an Easter craft session.
With big pink ears and a bunch of dangling carrot pom poms, these simple paper plate Easter Dreamcatchers will look eggs-traordinary hanging on your wall!
How To Make A Paper Plate Dream Catcher For Easter
This Easter dreamcatcher craft is easy and so much fun for kids of all ages. They can enjoy weaving their own dream catching net while building their fine motor skills and hand eye co-ordination too. Younger kids can enjoy the basic steps while older kids can challenge themselves with more intricate patterns or add personalized embellishments to their creations.
Kids will love hanging their Easter Bunny DIY versions of a traditional dreamcatcher above their beds. They’ll hop into bed knowing they’ll have eggs-tra special sweet dreams!
What a fun Easter craft and celebration and a lovely way for kids to learn about an important aspect of Native American culture too.
Let’s hop into creating a DIY Easter Bunny Dream Catcher Craft!
Crafting the Dream Catcher
Craft Supplies:
- White Paper Plates
- Pink Cardstock
- Pink Yarn
- Green Yarn
- Orange Yarn
- Green Ribbon
- Hole Punch
- Scissors
- Glue
- Sticky Tape
Step-by-Step Instructions To Make Paper Plate Dream Catchers
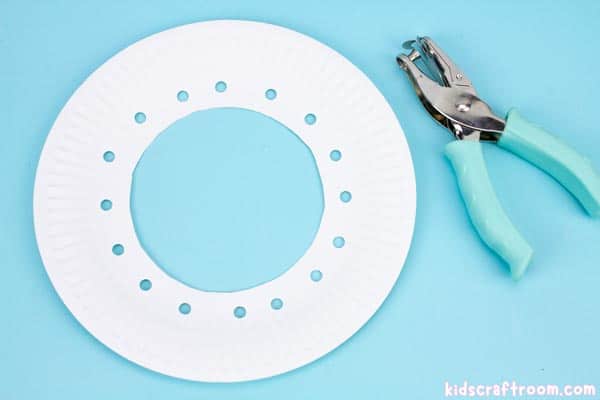
1 – First, cut out the middle of the paper plate to create your own dream catcher hoop.
2 – Secondly. use the hole punch to make small holes all around the inner edge of the dream catcher.
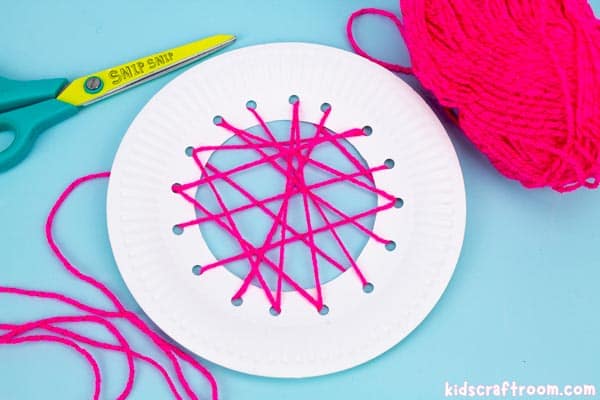
3 – Next, take a piece of wool a few foot long and sticky tape one end onto the back of the dream catcher or tie it with a tight knot.
4 – Then, use the piece of string or yarn to create a simple web pattern in the middle of the plate. (This is the perfect opportunity for younger kids to develop their fine motor skills and hand-eye coordination.)
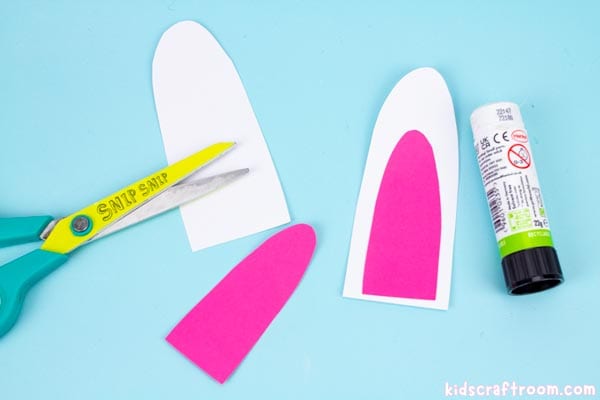
5 – From a second paper plate or white cardstock, cut out two big bunny ear shapes.
6 – Cut out some slightly smaller bunny ears from pink cardstock and glue them onto the paper plate ears.
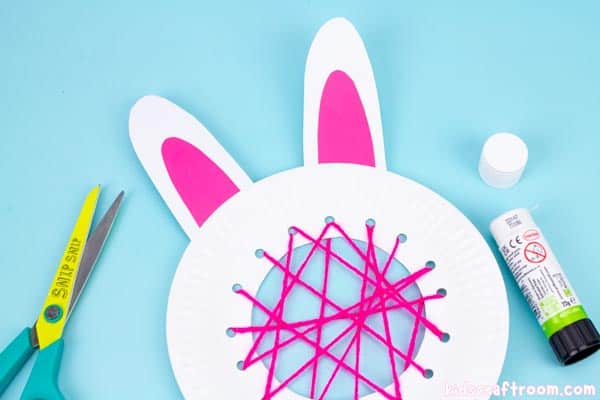
7 – Glue the ears onto the top of the dreamcatcher.
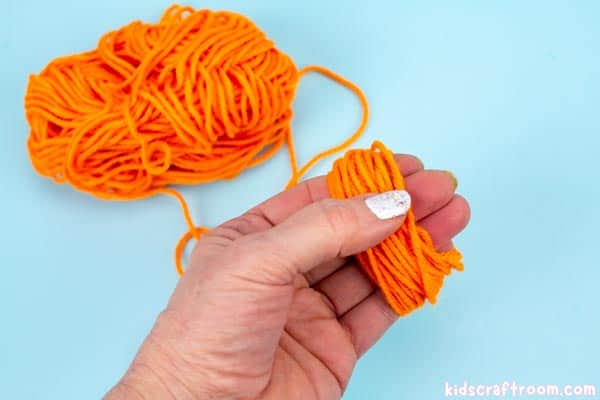
8 – Next, make some orange pompom carrots. You can do these by hand or use a pom-pom maker.
8a – How to make pompoms by hand: Wrap some orange yarn loosely round and round your hand.
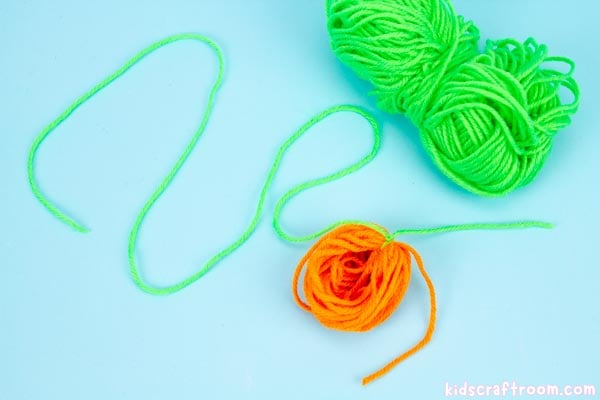
8b – Pull off the loops and tie them together with a long length of green yarn in a double knot.
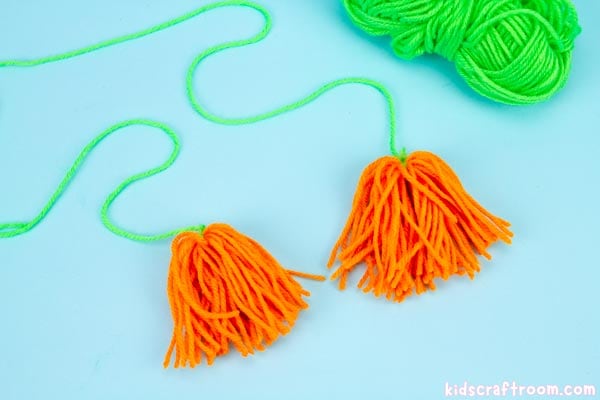
8c – Cut through the bottom of all of the loops to make the pom pom carrots.
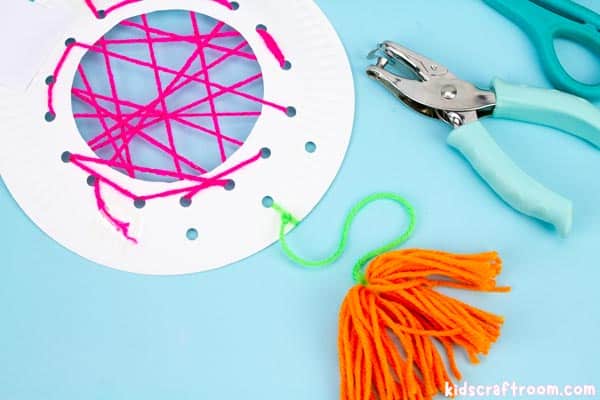
9 – Then, punch some holes and attach them to the bottom of the dream catcher on long green pieces of string or yarn of different lengths to represent carrots. These will sway below your dream catcher, adding a burst of color and fun.
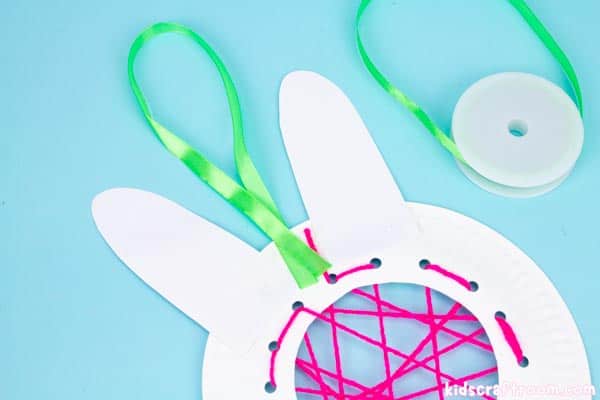
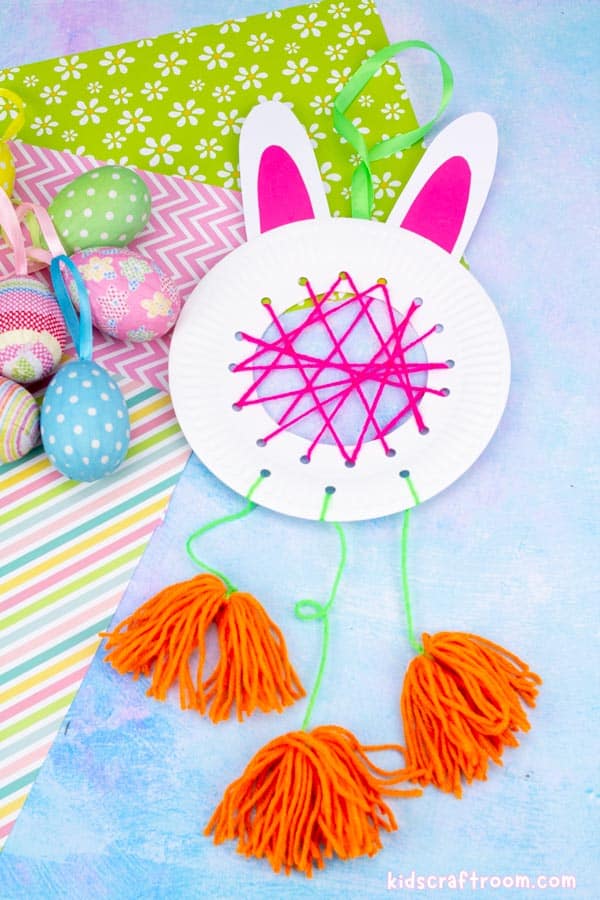
10 – Finally, add a hanging loop of ribbon to the top of the dream catcher.

Now you can find a great place to hang your own dreamcatcher. Perhaps on a bedroom wall or by a window where the morning light can shine through?
I hope you enjoy making your own DIY dream catcher. Happy crafting and the sweet dreams!
More Fun Easter Crafts To Enjoy:

Easter Bunny Dream Catcher Craft
Celebrate Easter with a super cute Bunny Dream Catcher Craft!
Materials
- White Paper Plates
- Pink and White Cardstock
- Pink Yarn
- Green and Orange Yarn
- Green Ribbon
- Hole Punch
- Scissors
- Glue
- Sticky Tape
Instructions
 Cut the middle out of a paper plate and punch holes around the inner ring.
- Tape a length of yarn onto the back and weave it through the holes to make a web.
- From white cardstock cut two bunny ears. Then cut two inner ears from pink cardstock.
- Glue the ears together and stick them to the top of the plate.
- Wrape orange yarn around your hand.
- Slide the loops off and tie them together with some green yarn.
- Cut through the bottom of the orange hoops to make pom poms and then punch holes and tie them to the bottom of the plate.
- Sticky tape a ribbon hanging loop to the back of the top of the plate.
 Hang your Easter dream catcher up.
 Hang your Easter dream catcher up.